
Source: Q2 2024
Getting started
First, navigate to the Setup Page. Next, make sure to read the first two steps carefully, as they describe, that you need to make sure:
- The website in your Business Manager is accessible/active. If the Website in your Business Settings is not reachable, it will most likely fail. If you cannot edit the website, try to redirect the website to your new/latest website.
- The phone number used for WhatsApp cannot be registered with the WhatsApp (Business) App, unless you connect through WhatsApp Coexistence (see below)
- You need to have Admin rights, to create a WhatsApp Account linked to your Business Manager
- No credit card is required in Meta — Chatarmin covers WhatsApp billing for direct Meta setups
Creating your WhatsApp Account
Once you have reached Step 4, click Create your WhatsApp Account and follow the Meta pop-up. If you already use the WhatsApp Business App, use Connect existing WhatsApp Business App instead (see Coexistence). Then follow the steps:
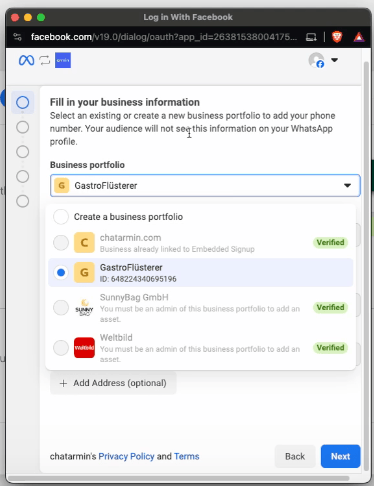
Select correct Business Manager
Create or select your WhatsApp Business Account
Make sure, to select “Create …” on both “dropdowns”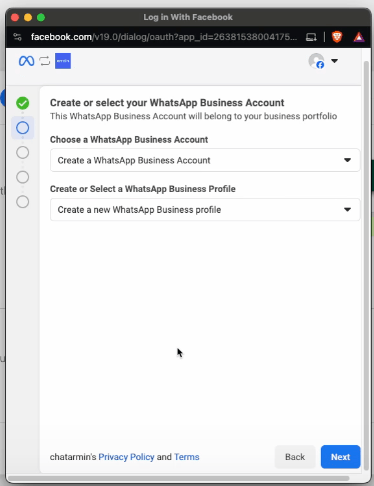
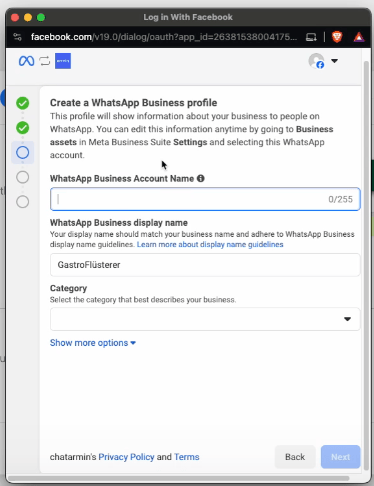
Create a WhatsApp Business Profile
Fill out the details for your WhatsApp Account:- The first Input, will only be visible to your Team inside the Business Manager
- The second Input, is the so-called “Display Name” and will be shown to your customers on WhatsApp (this can be changed later)
- Select the appropriate Category for your business
- Either fill in the Description now or edit it afterwards through Chatarmin
- Make sure the correct website is selected
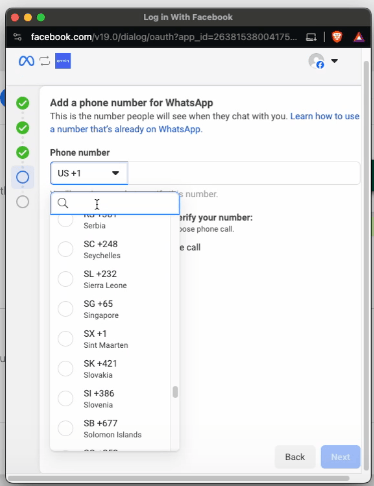
Add a phone number for WhatsApp
Now type in your WhatsApp Number and make sure to select the correct Verification Type: SMS/VoiceHere you will find the requirements for connecting a phone number with Meta Business Manager and WhatsApp: Phone Number Requirements
After phone verification
Now you can click on “Continue” & “Finish installation”. Now the Pop-up closes and you should see a success message in a bit. Once succeeded, you can click on “Continue: Verify” in ChatarminConnect an existing WhatsApp Business App (Coexistence)
Use this path if you already run the WhatsApp Business App on your phone and want to keep using it alongside Chatarmin on the same number.1
Open WhatsApp setup in Chatarmin
Open the WhatsApp setup page and complete Steps 1–3.
2
Start the coexistence connection
In Step 4, click Connect existing WhatsApp Business App.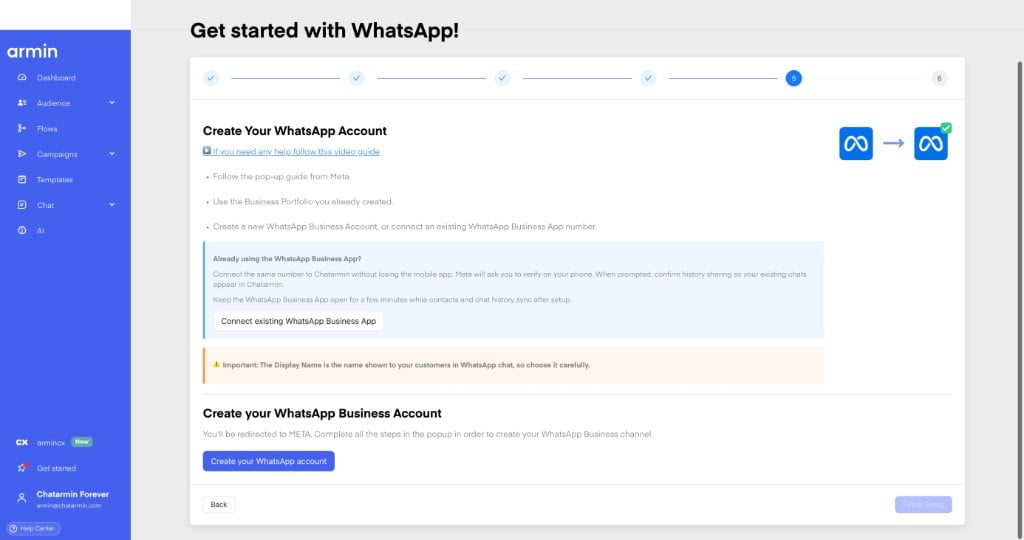
3
Open Linked devices in the WhatsApp Business App
On your phone, open the WhatsApp Business App. Go to Settings → Linked devices → Link a device.
4
Scan the QR code from the WhatsApp Business App
Use the WhatsApp Business App to scan the QR code shown in the Meta pop-up on your computer. After scanning, tap Connect to the Business Platform.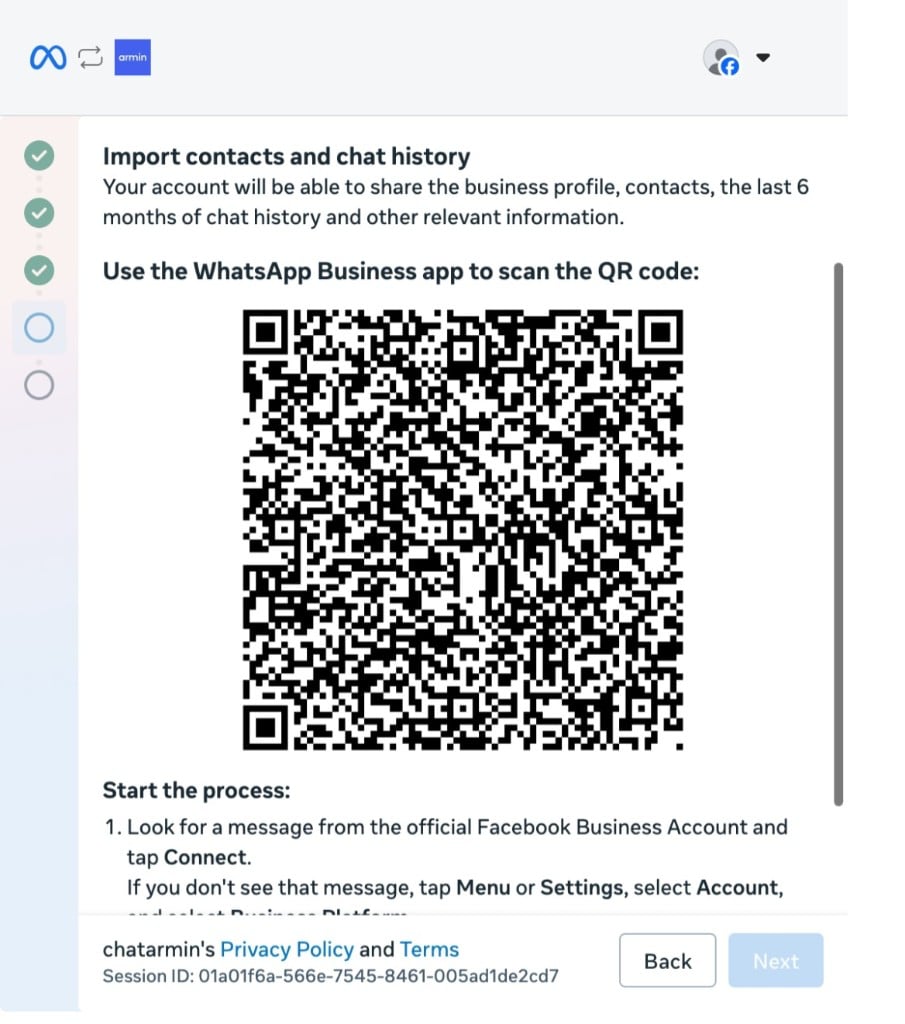
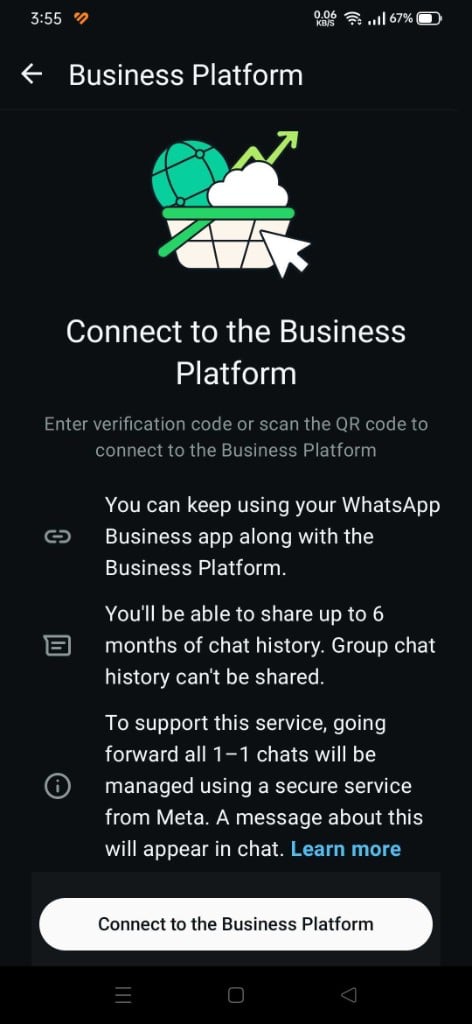
The QR code in this screenshot is expired and is shown only as a visual reference. Scan the current QR code displayed during your setup.
5
Sync your chat history
Select Share all chats to import up to six months of one-to-one chat history, then tap Confirm. Group chat history cannot be shared.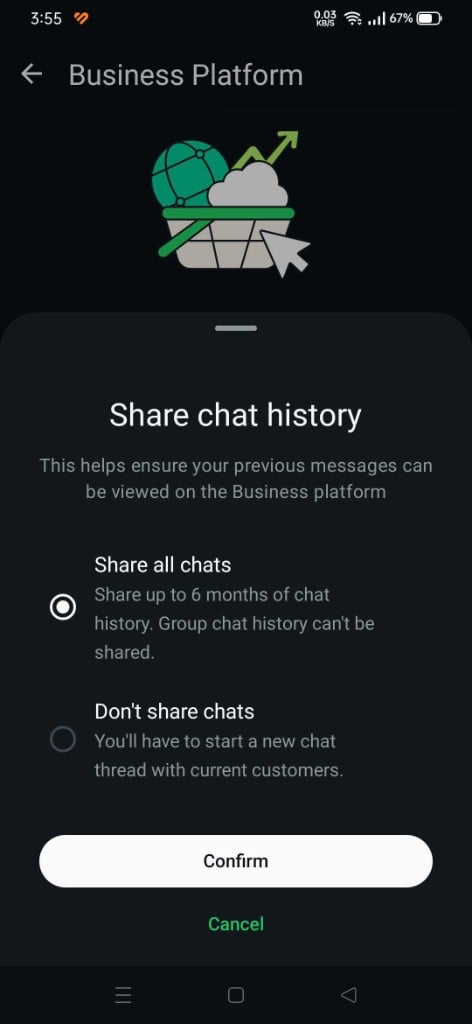
6
Confirm access in Meta
After confirming chat history sync in the WhatsApp Business App, return to the Meta pop-up. Review the Business Portfolio, WhatsApp Business account, and requested permissions, then click Confirm.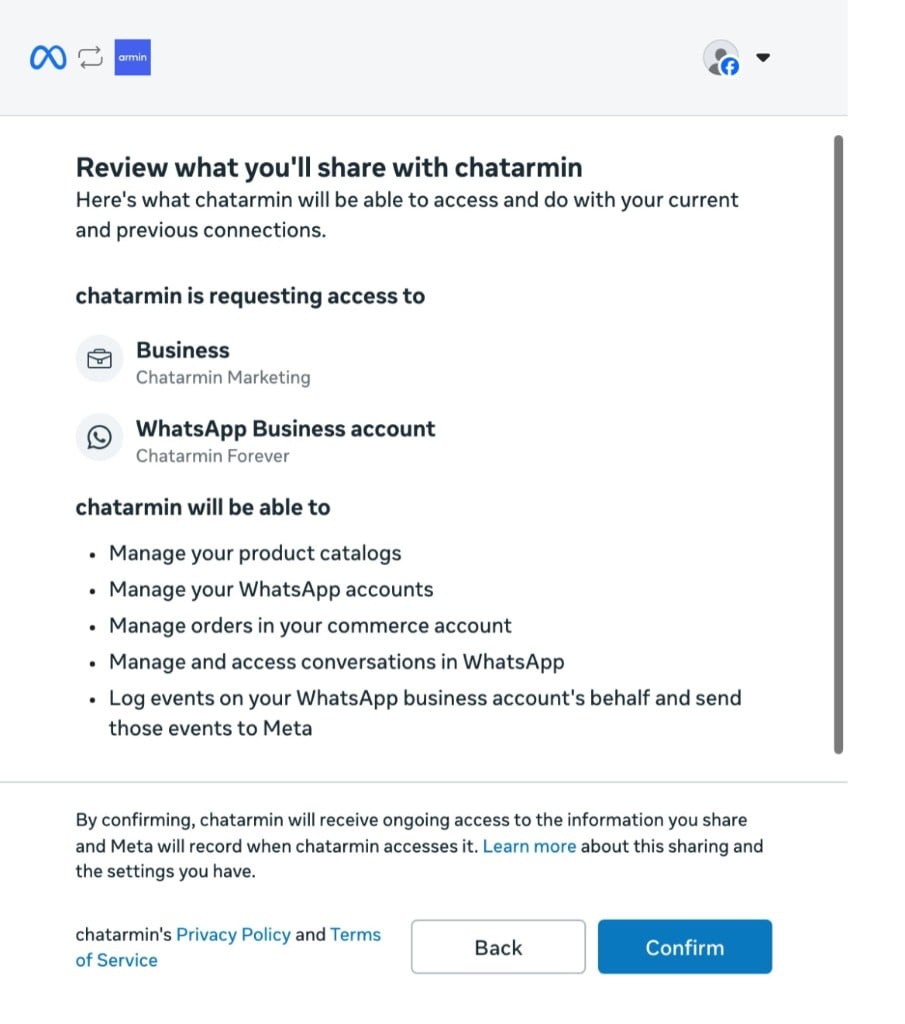
7
Finish the connection
After Meta confirms the connection, click Finish. Keep the WhatsApp Business App open for a few minutes while contacts and chat history sync with Chatarmin.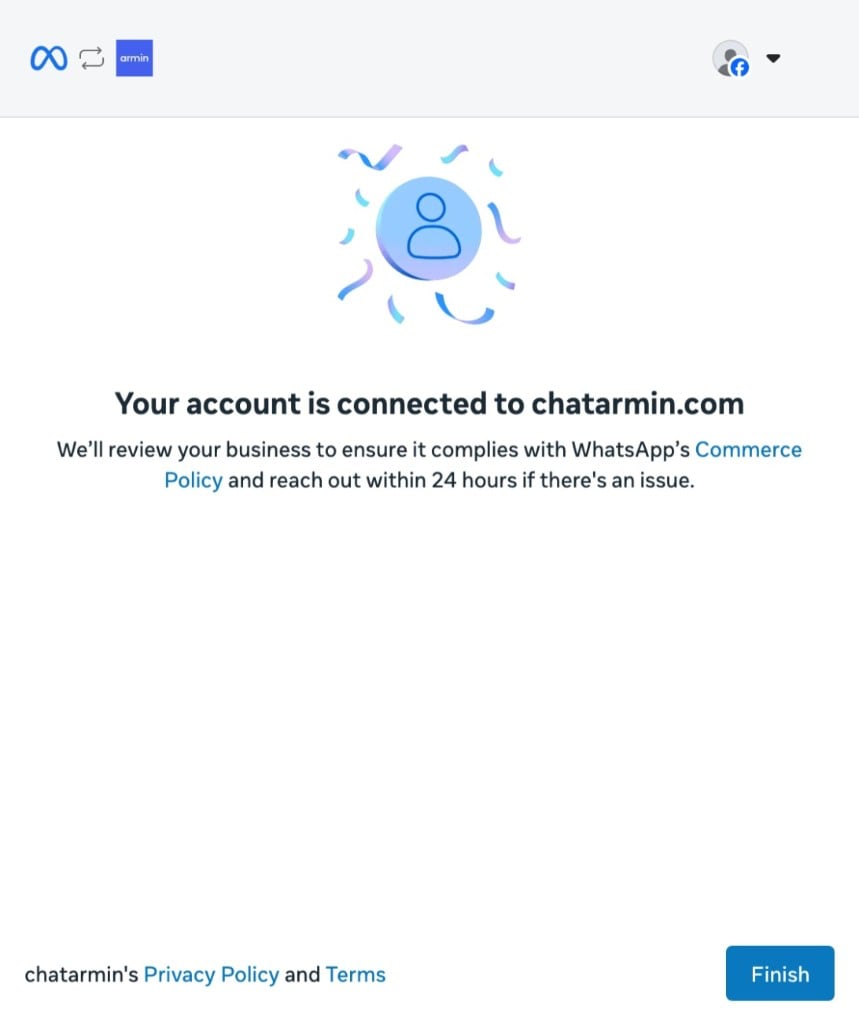
Verify your Business
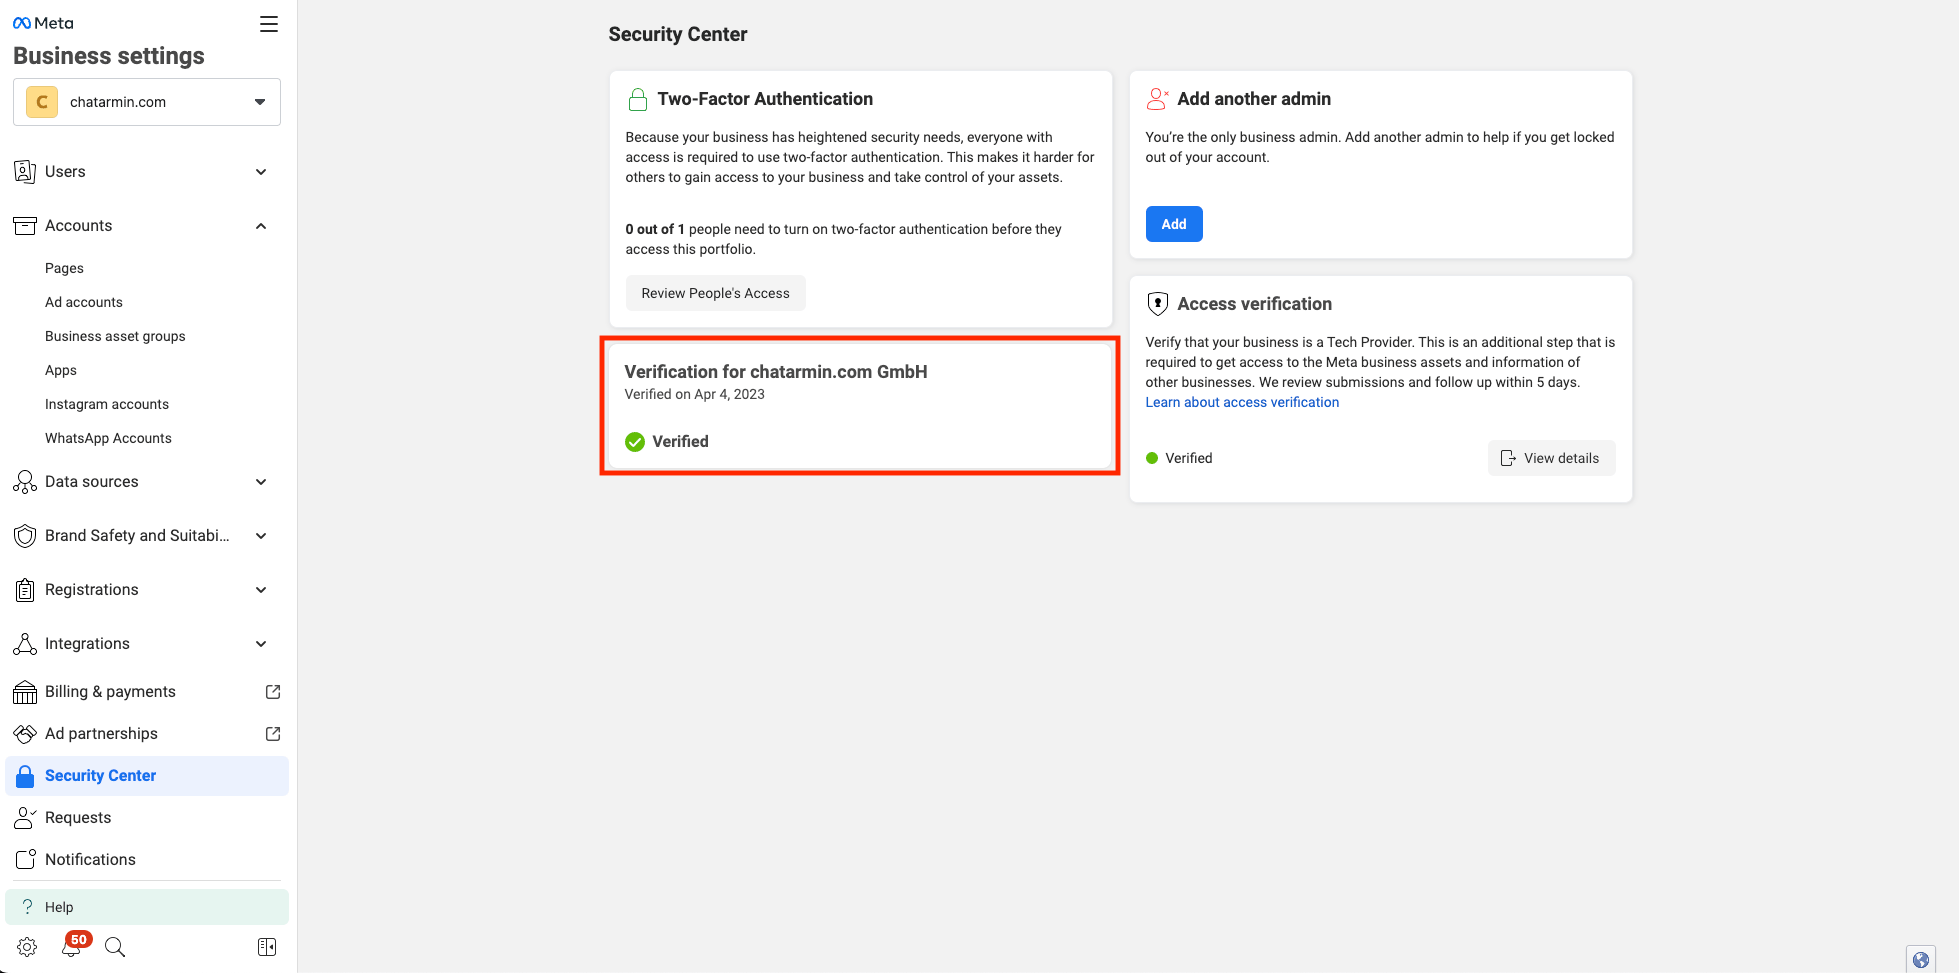
Once your WhatsApp Account got created successfully, make sure your Business is verified, so the Messaging Limit gets increased. Go to your Security Center inside your Business Manager under. Check your verification status and make sure its verified.
WhatsApp billing is covered by Chatarmin
During setup in Chatarmin, confirm that you do not need to add a payment card in Meta. Chatarmin covers WhatsApp conversation billing through its credit line, which is attached automatically when you create your WhatsApp account. In the Chatarmin setup wizard:
- On the WhatsApp Billing step, check the box to confirm you will not add a payment card.
- On the Billing is covered step, continue without opening Meta payment settings.
- Create your WhatsApp account in the next step so Chatarmin can attach billing.
Next Steps
Congrats! You have successfully created your WhatsApp Account! 🥳 Check out our Onboarding Guide to get you started with Chatarmin!