Creating your WhatsApp Account
You can either watch this Loom or follow the detailed description below.
Source: Q2 2024
Getting started
First, navigate to the Setup Page.
Next, make sure to read the first two steps carefully, as they describe, that you need to make sure:
The website in your Business Manager is accessible/active. If the Website in your Business Settings is not reachable, it will most likely fail. If you cannot edit the website, try to redirect the website to your new/latest website.
The Phone Number used for WhatsApp, cannot be registered with the WhatsApp (Business) App
You need to have Admin rights, to create a WhatsApp Account linked to your Business Manager
Creating your WhatsApp Account
Once you have reached Step 3, click on "Create your WhatsApp Account". Then follow the steps:
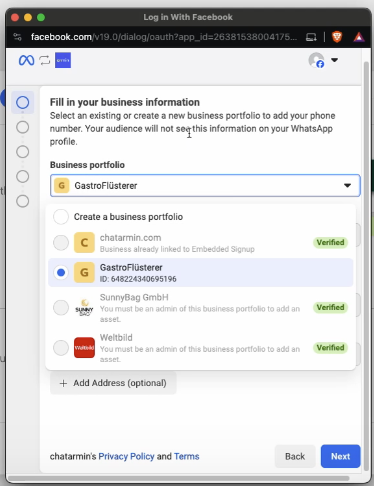
Select correct Business Manager
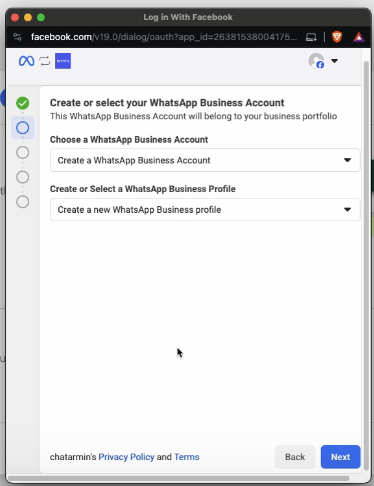
Create or select your WhatsApp Business Account
Make sure, to select "Create ..." on both "dropdowns"
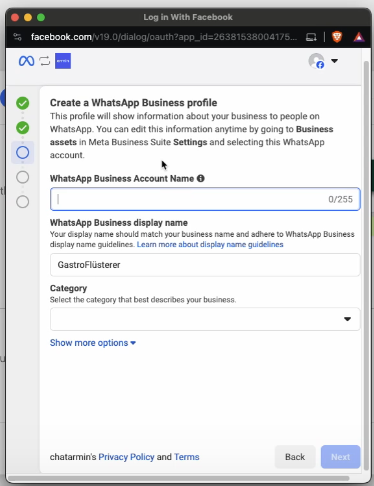
Create a WhatsApp Business Profile
Fill out the details for your WhatsApp Account:
The first Input, will only be visible to your Team inside the Business Manager
The second Input, is the so-called "Display Name" and will be shown to your customers on WhatsApp (this can be changed later)
Select the appropriate Category for your business
Either fill in the Description now or edit it afterwards through Chatarmin
Make sure the correct website is selected
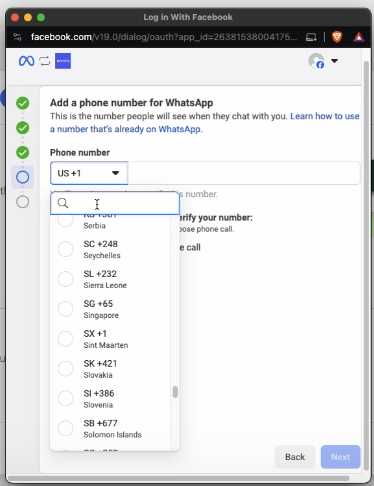
Add a phone number for WhatsApp
Now type in your WhatsApp Number and make sure to select the correct Verification Type: SMS/Voice
Here you will find the requirements for connecting a phone number with Meta Business Manager and WhatsApp: Phone Number Requirements
After phone verification
Now you can click on "Continue" & "Finish installation". Now the Pop-up closes and you should see a success message in a bit.
Once succeeded, you can click on "Continue: Verify" in Chatarmin
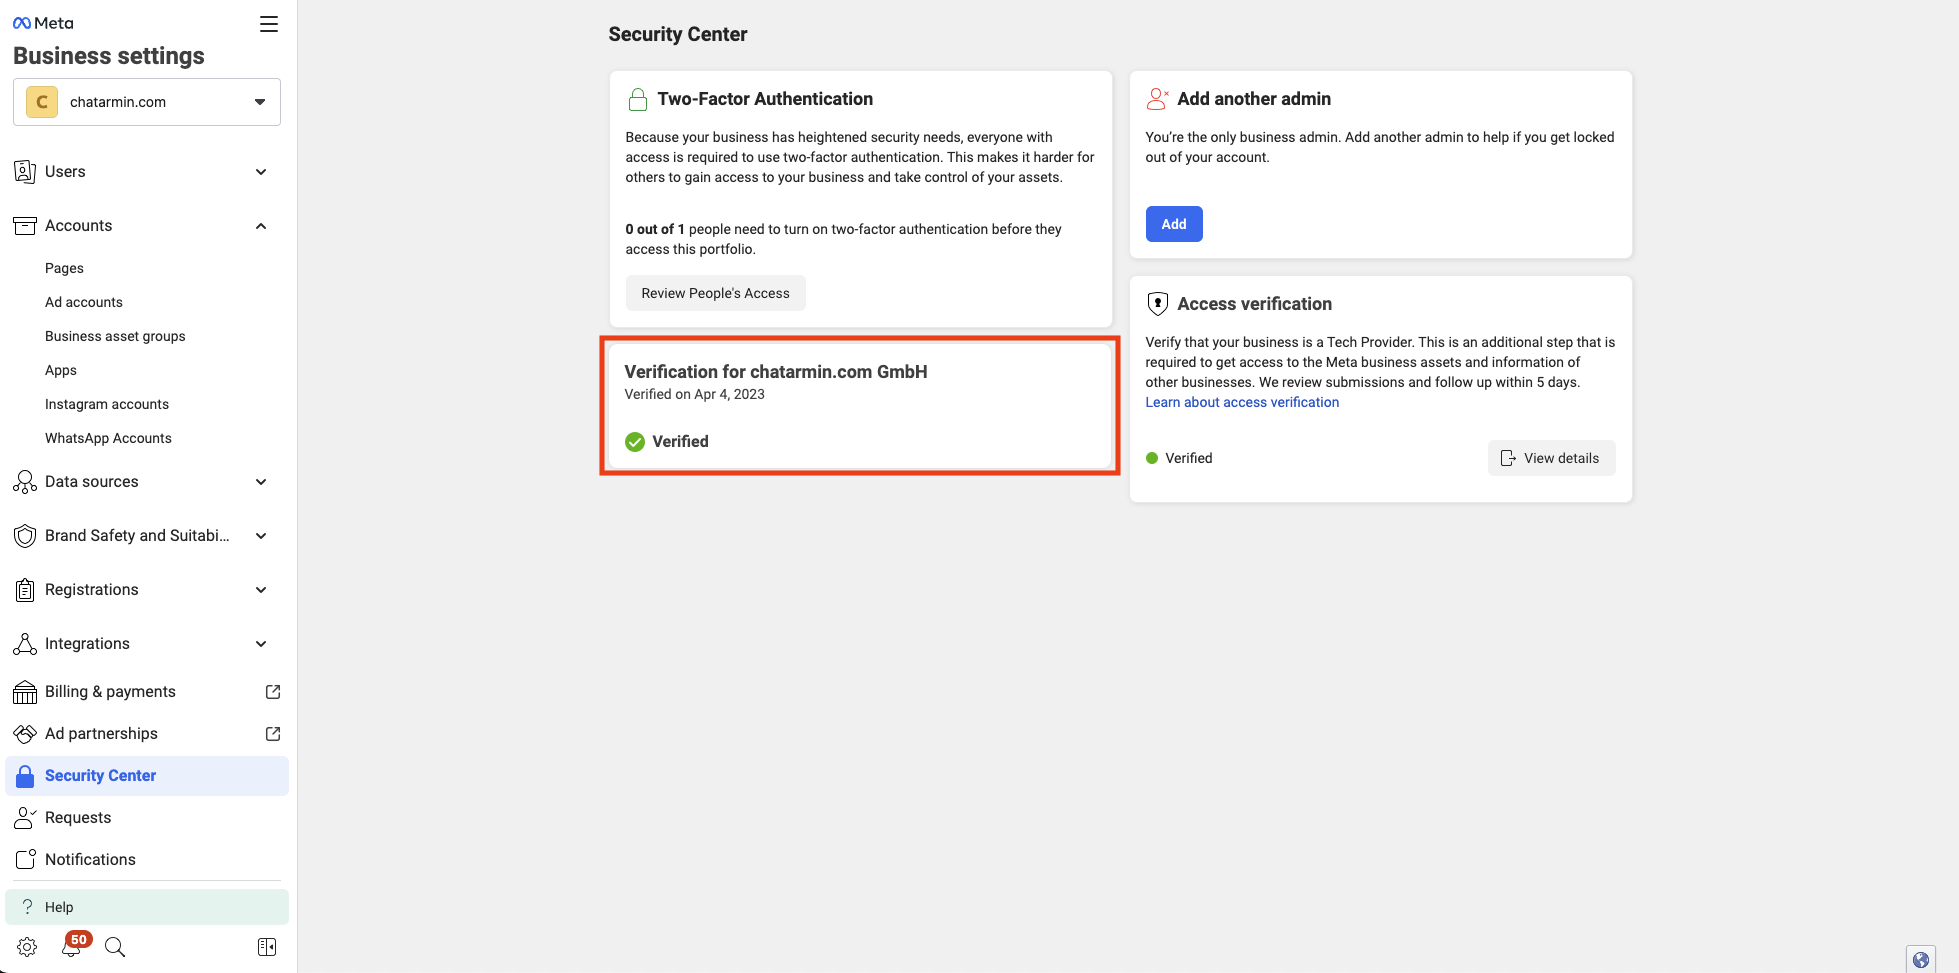
Verify your Business
Once your WhatsApp Account got created successfully, make sure your Business is verified, so the Messaging Limit gets increased.
Go to your Security Center inside your Business Manager under. Check your verification status and make sure its verified.
Add your Payment Method
Now go to your Billing Settings inside your Business Manager and add a Payment Method for your newly created WhatsApp Account.
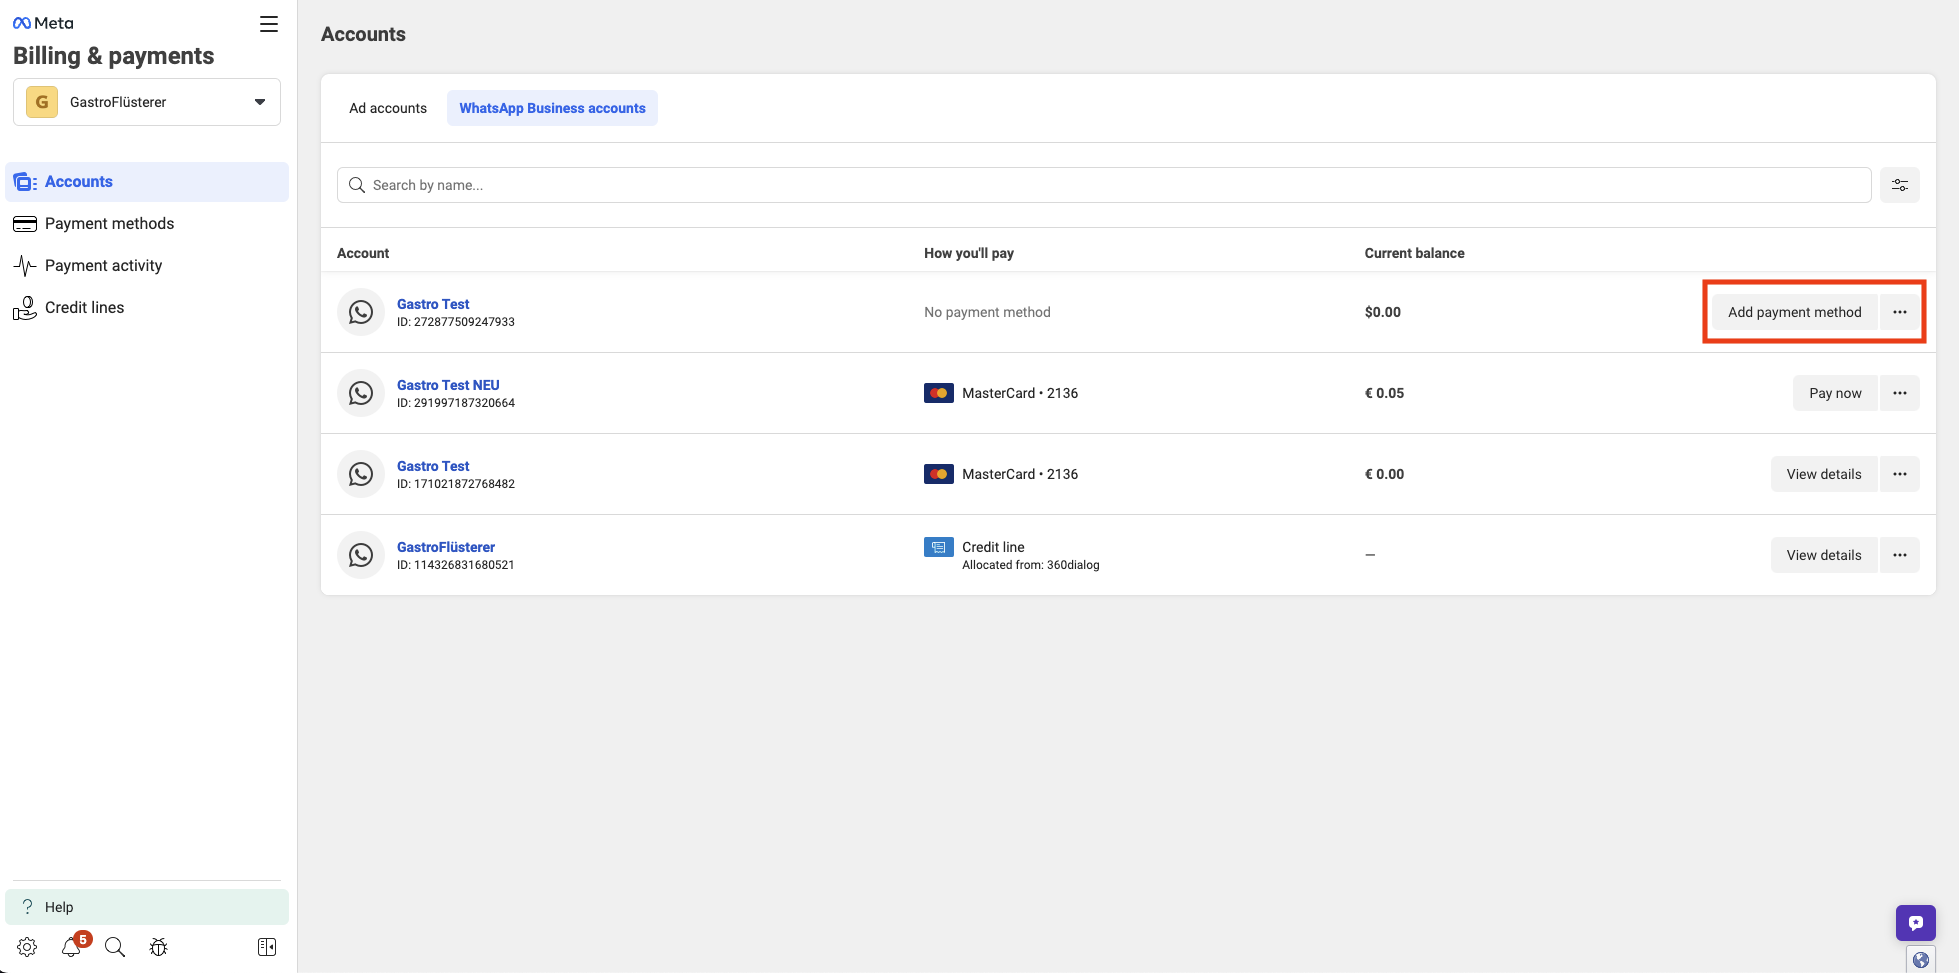
ATTENTION: Please be aware you need to enter Credit Card and Debit Cards may not be accepted!
After you added the payment Method please set the Card as Default! This video shows you how to do that:
It is crucial, to set the card as Default, otherwise Meta will not let you send campaigns in chatarmin!
ATTENTION: If your account is continuously blocked, you might encounter an overdue saldo. Please make sure you pay any open amounts in your WhatsApp billing hub directly. If you want, feel free to check your chats for error-messages that disclose further information, in Chatarmin -> Chats, and check the failed message-sends for informational displays.
Next Steps
Congrats! You have successfully created your WhatsApp Account! 🥳
Check out our Onboarding Guide to get you started with Chatarmin!