JTL Wawi Shipping Flow
Create Shipping Flow
First of all, create a Flow in Chatarmin with:
POST Request as the Trigger
Create a Template with your Text & add a Website CTA Button. (URL is doesn't matter since it gets overwritten in the Flow. So you can just do something like
https://your-website.com`)
POST Request Trigger
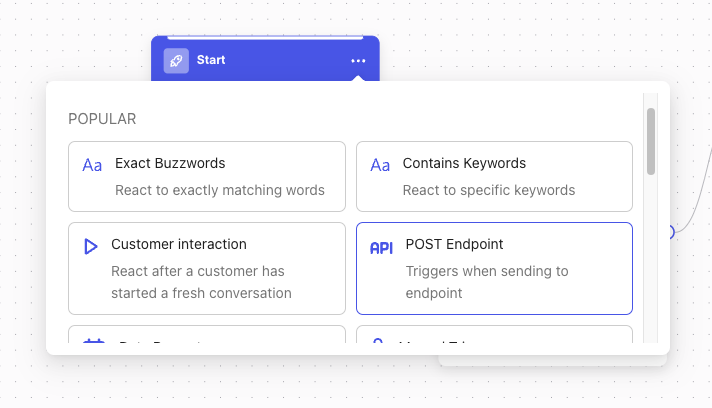
Choose the trigger
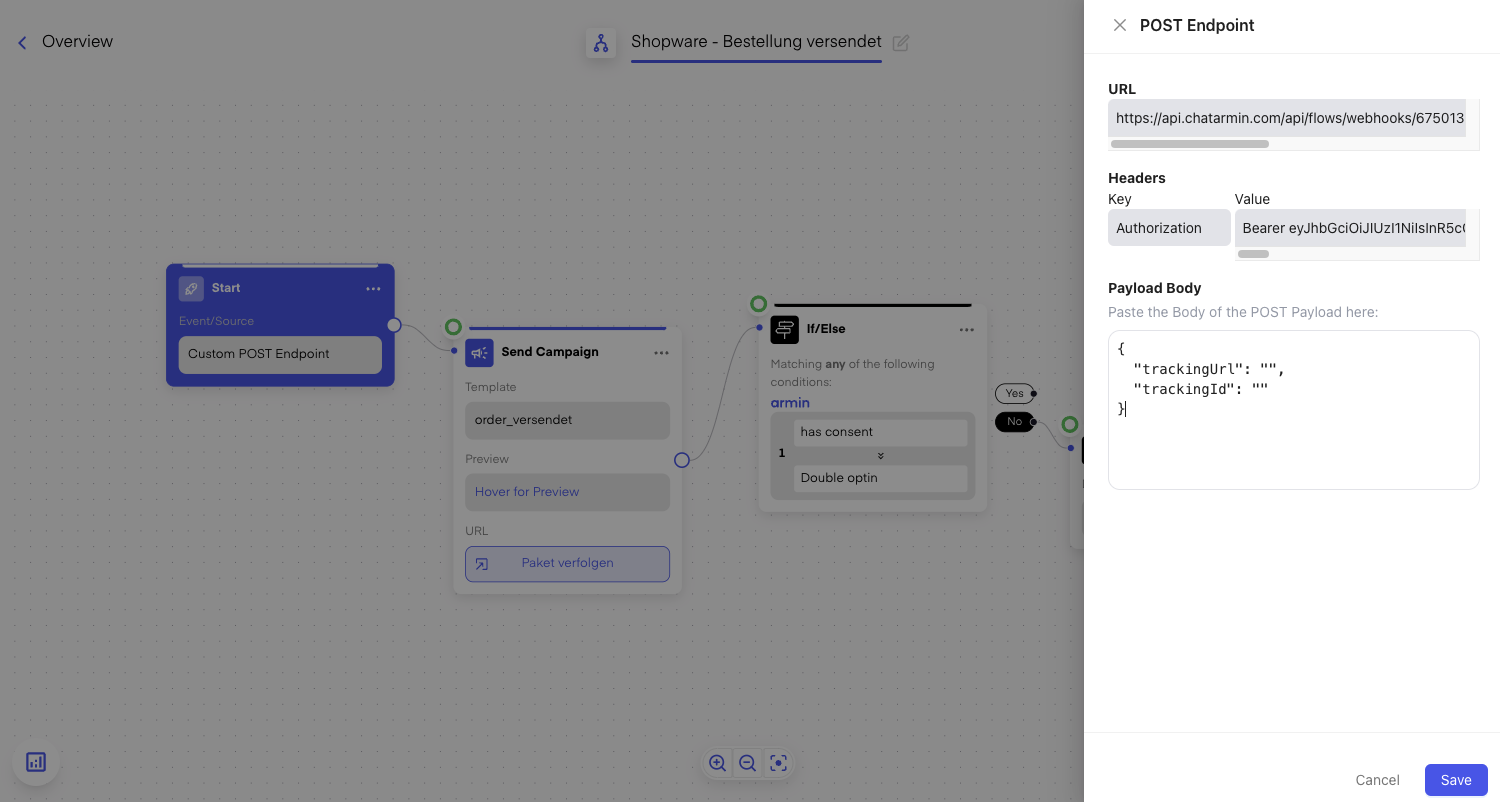
2. Set the Payload Body:
{
  "trackingUrl": "",
  "trackingId": ""
}
like so:
Create Template
Add a Template here with the following:
Template Category -> Utility
Template Type -> Normal
Body Text -> For Example:
Hallo #{{1}},

dein Paket ist auf dem Weg! 📦 Deine Tracking-ID lautet: #{{2}}

Verfolge die Reise deiner Blumen indem du unten auf den Link klickst 👇

Herzliche Grüße,
dein Team von XXXXX
Add Website CTA Button (Website URL doesn't matter as long as its valid. It will be overwritten in the Flow by the Tracking URL anyways):

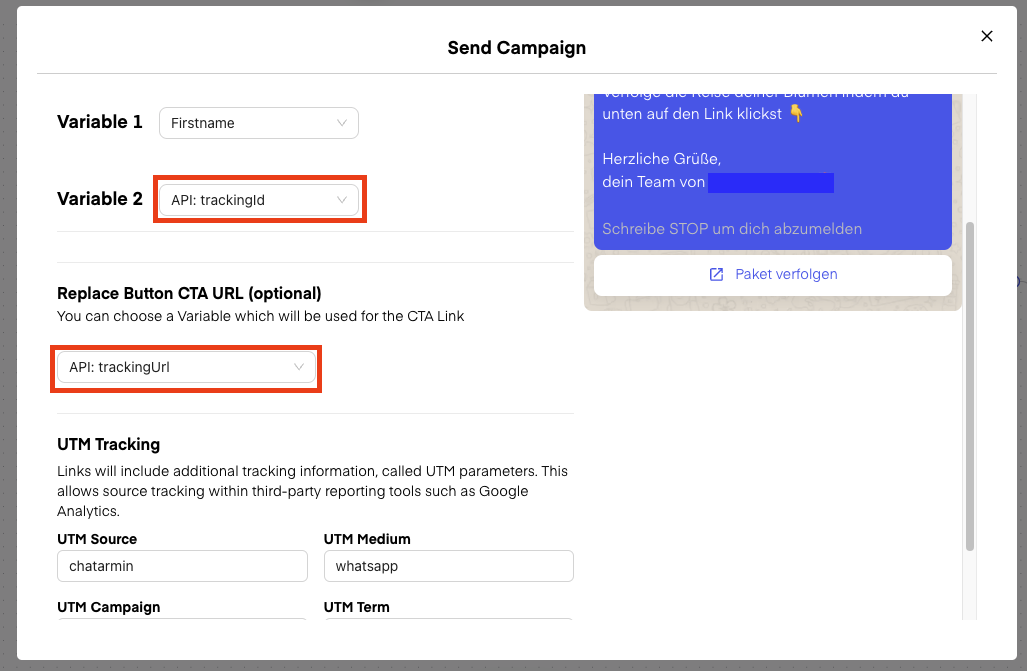
Now use that Template in the Flow, with Send Campaign & set the correct Variables:
Setting up JTL Workflow
Open JTL Wawi and navigate to the JTL Workflows:
Navigate to JTL-Workflows
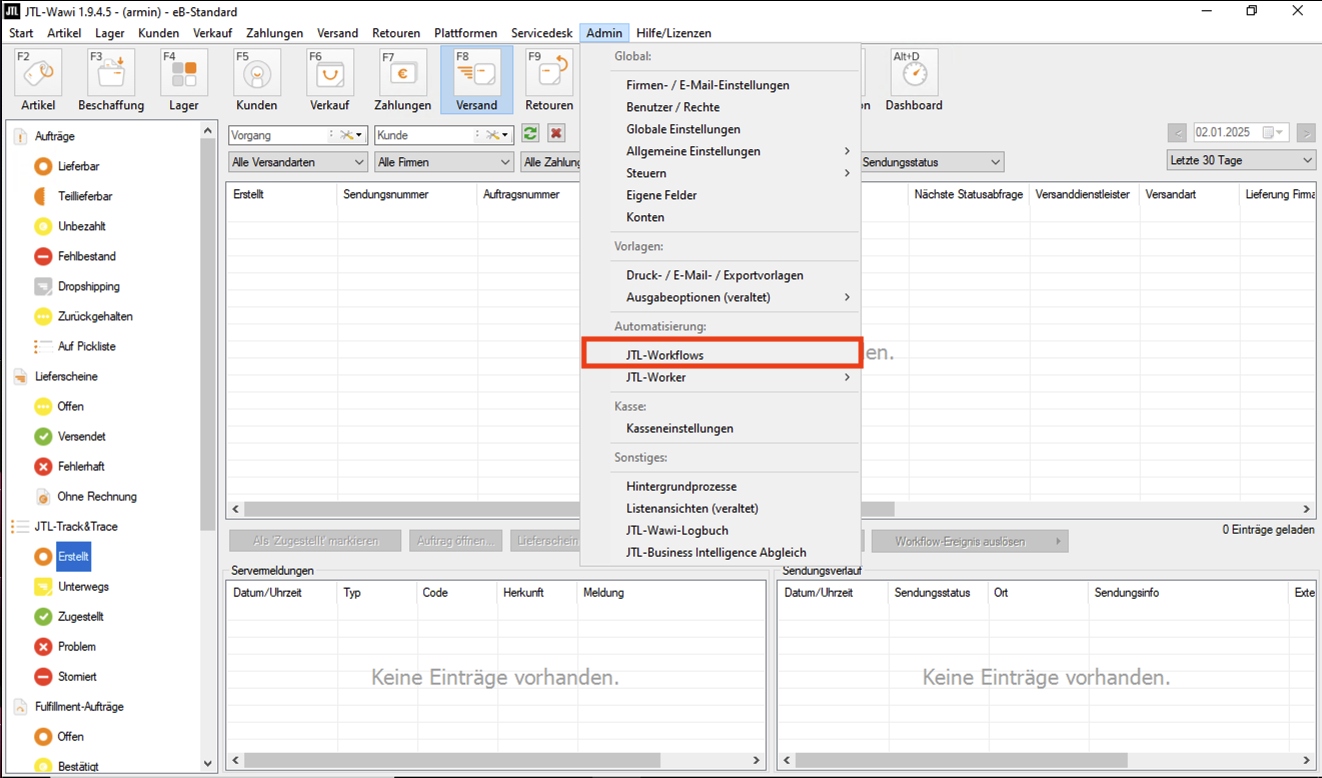
Then go to "Versand"
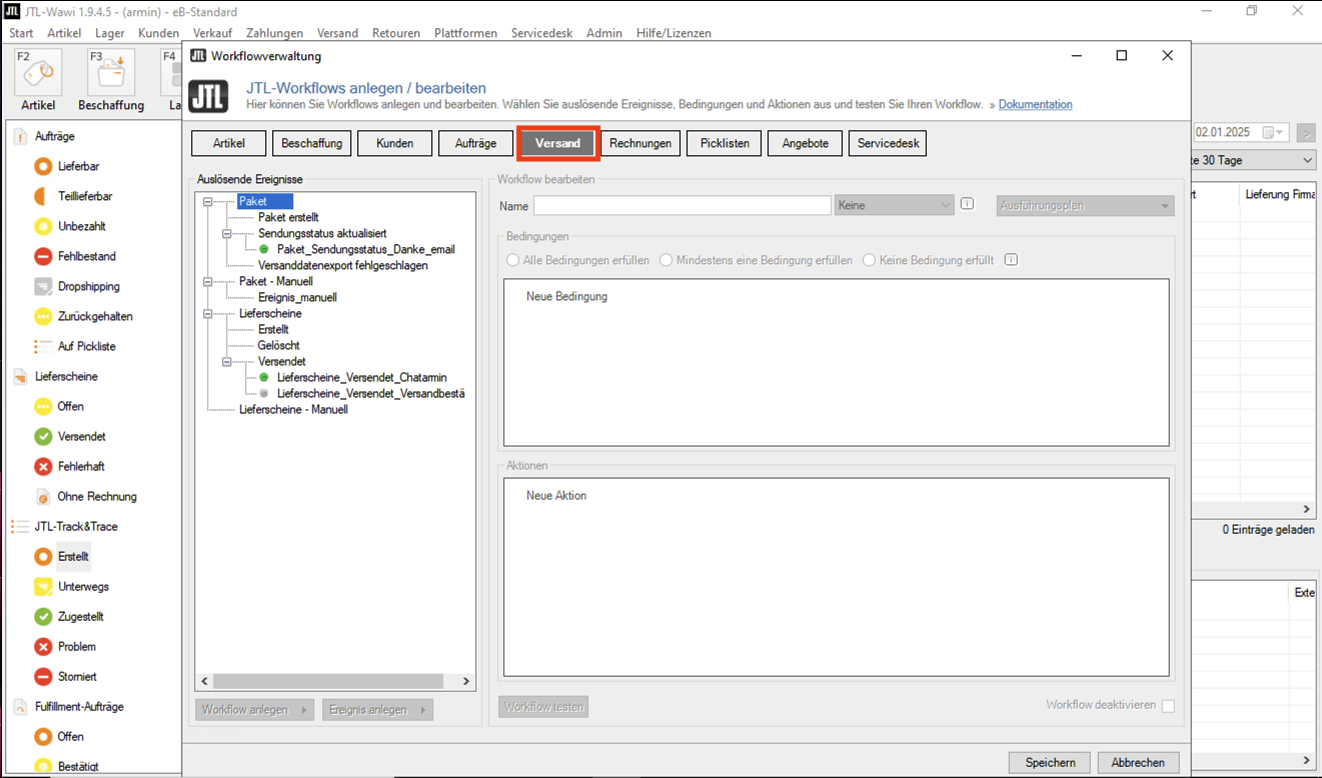
Create a new Workflow
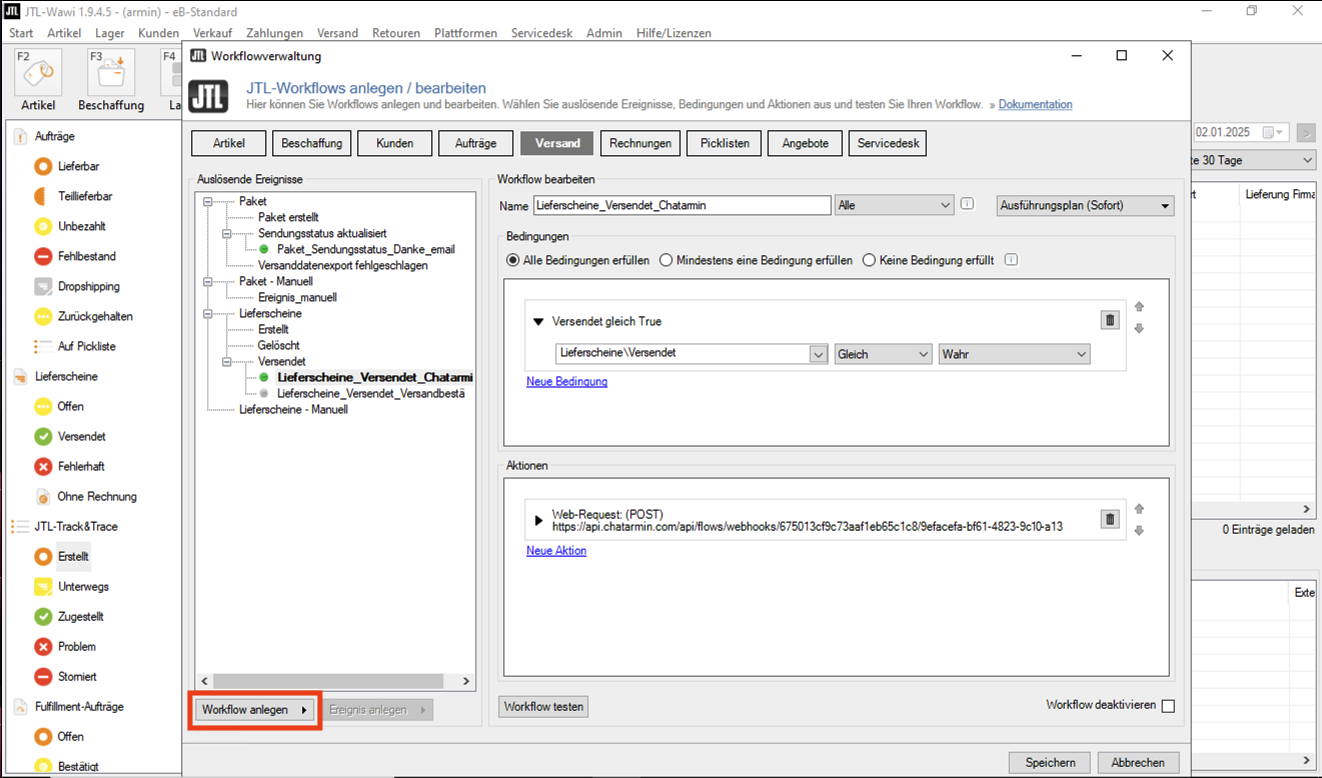
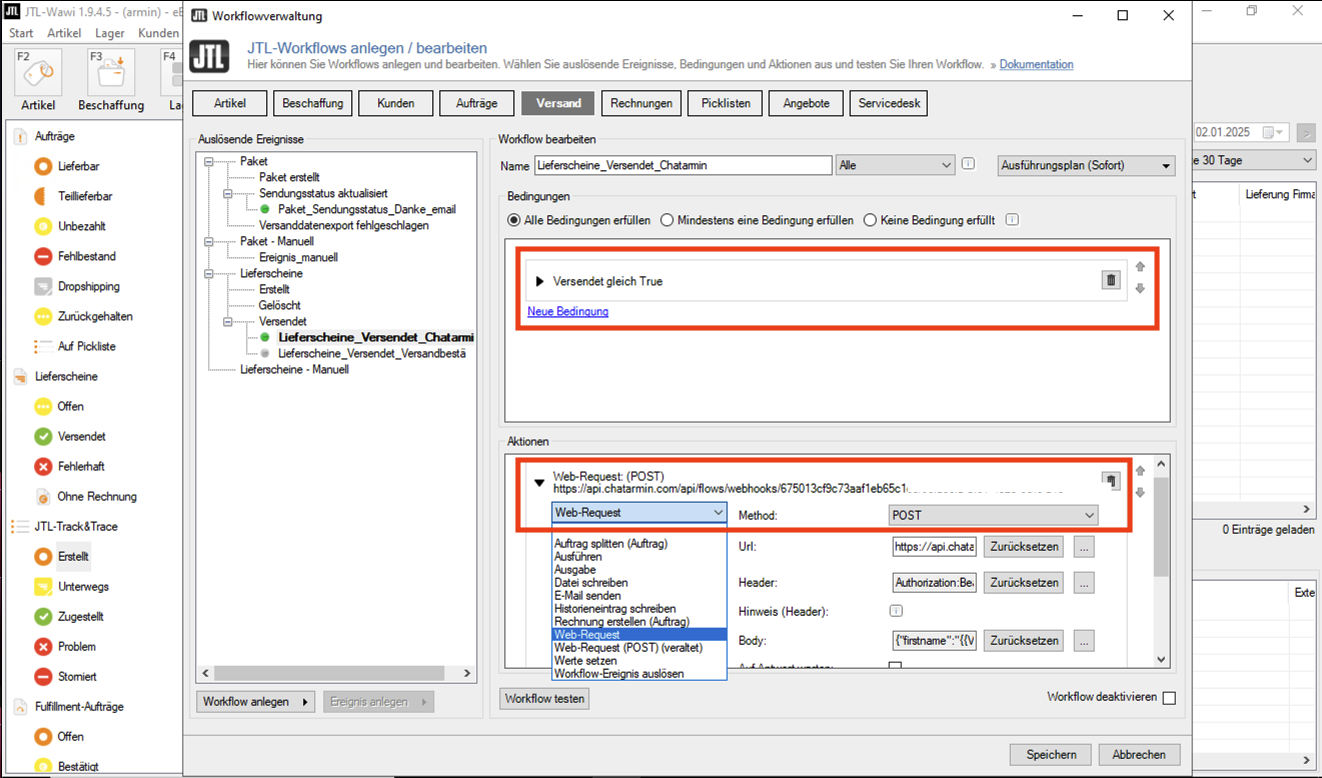
Add your Condition & make the "Action" a "Web-Request"
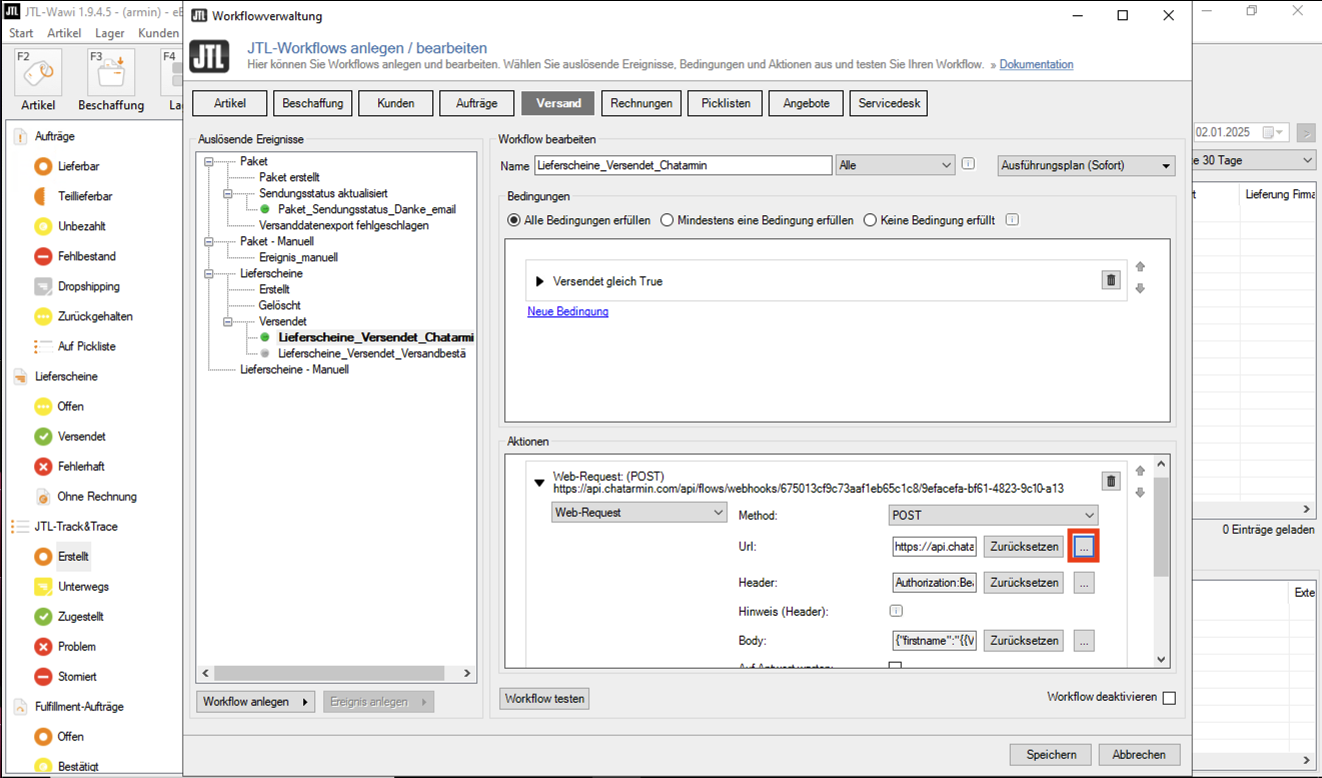
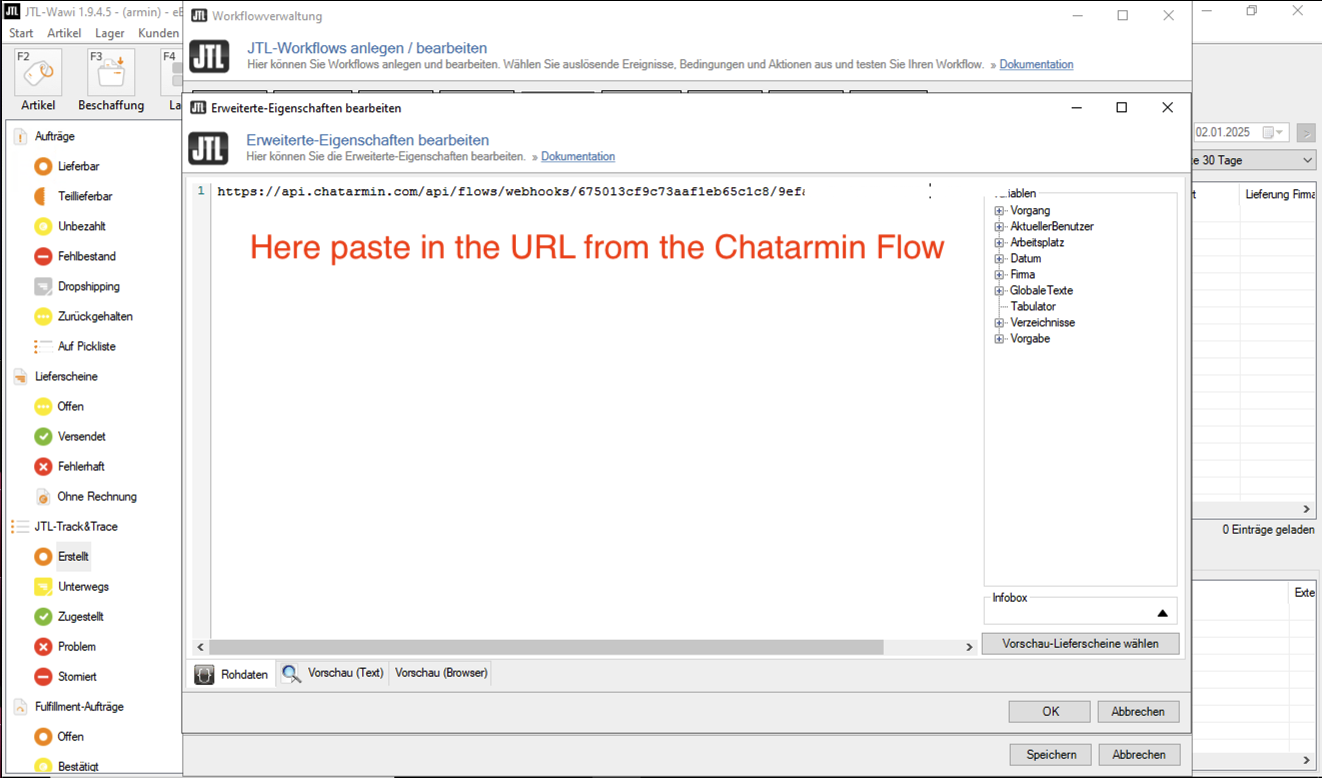
Now set the URL of the JTL Action, to the URL from the Chatarmin Flow-Trigger:
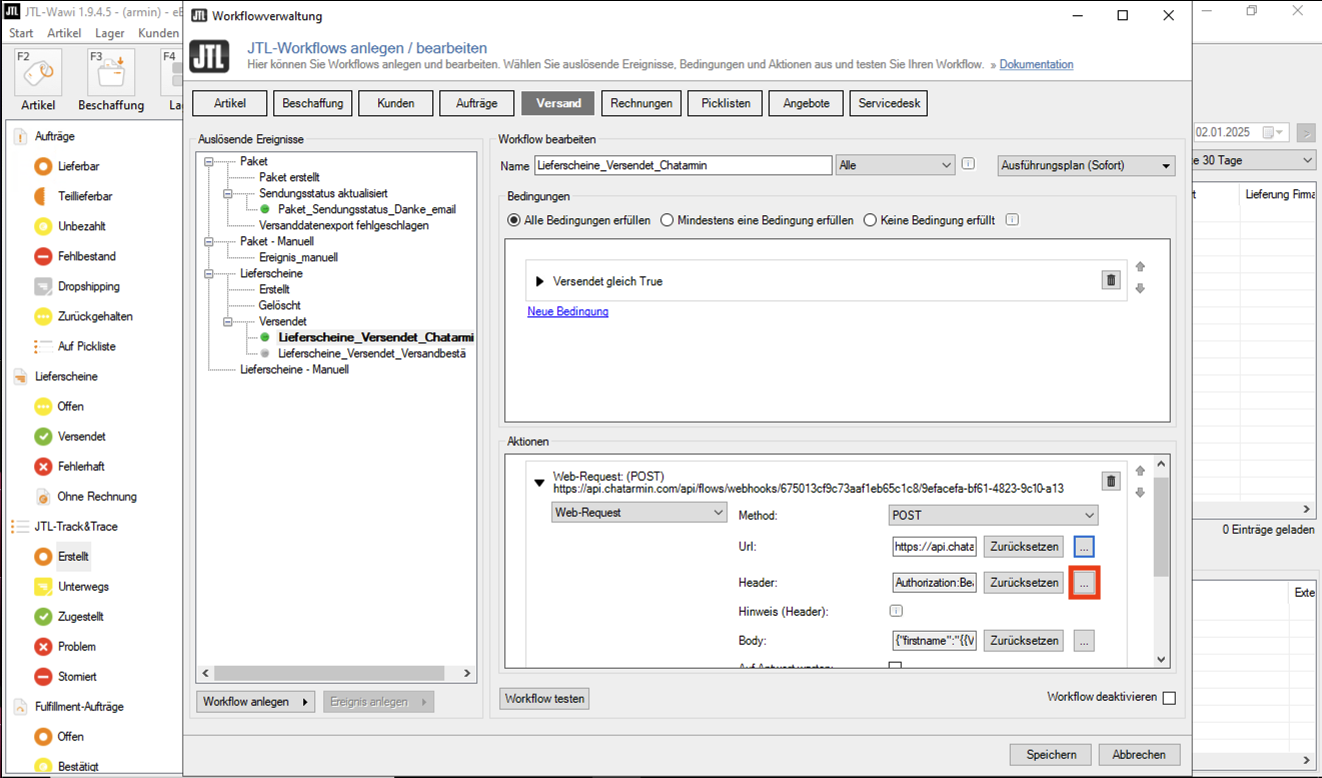
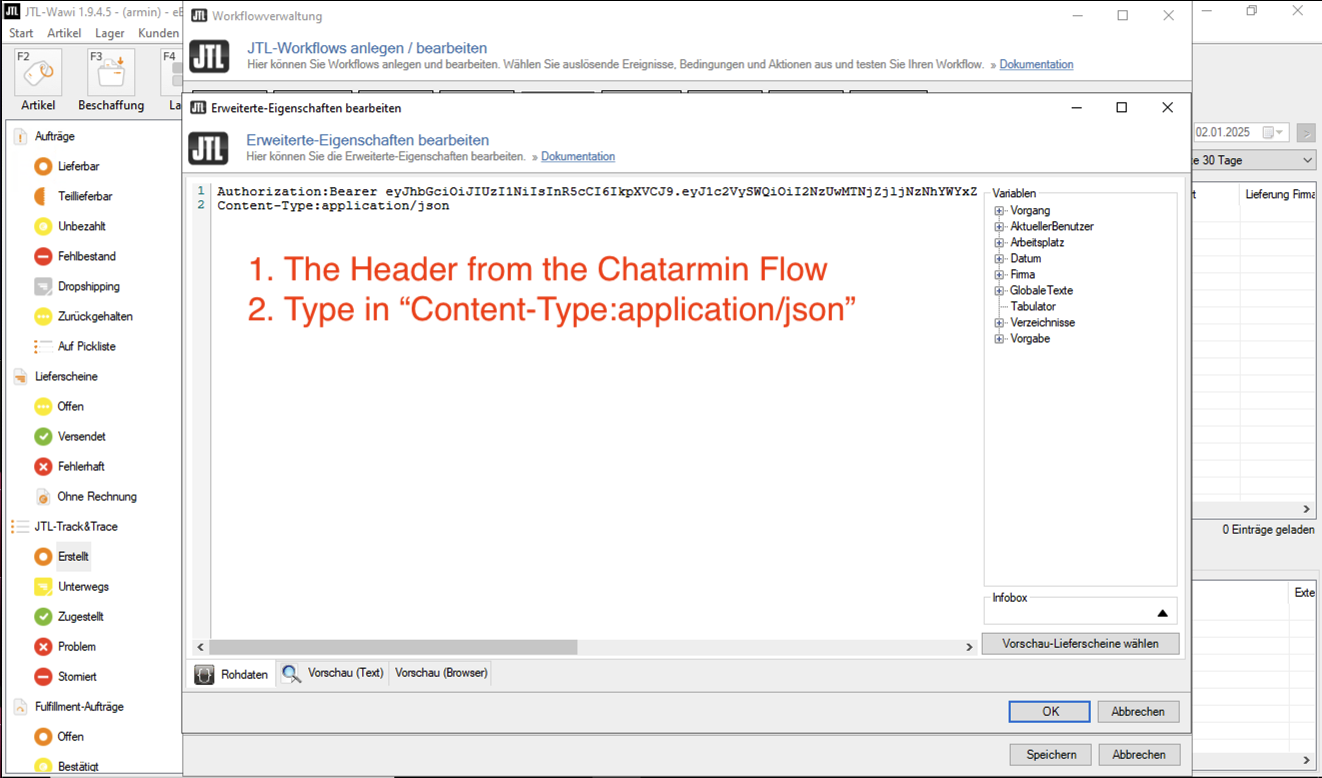
Now the same for "Headers":
Now also make sure to set the "Body" of the JTL-Request:
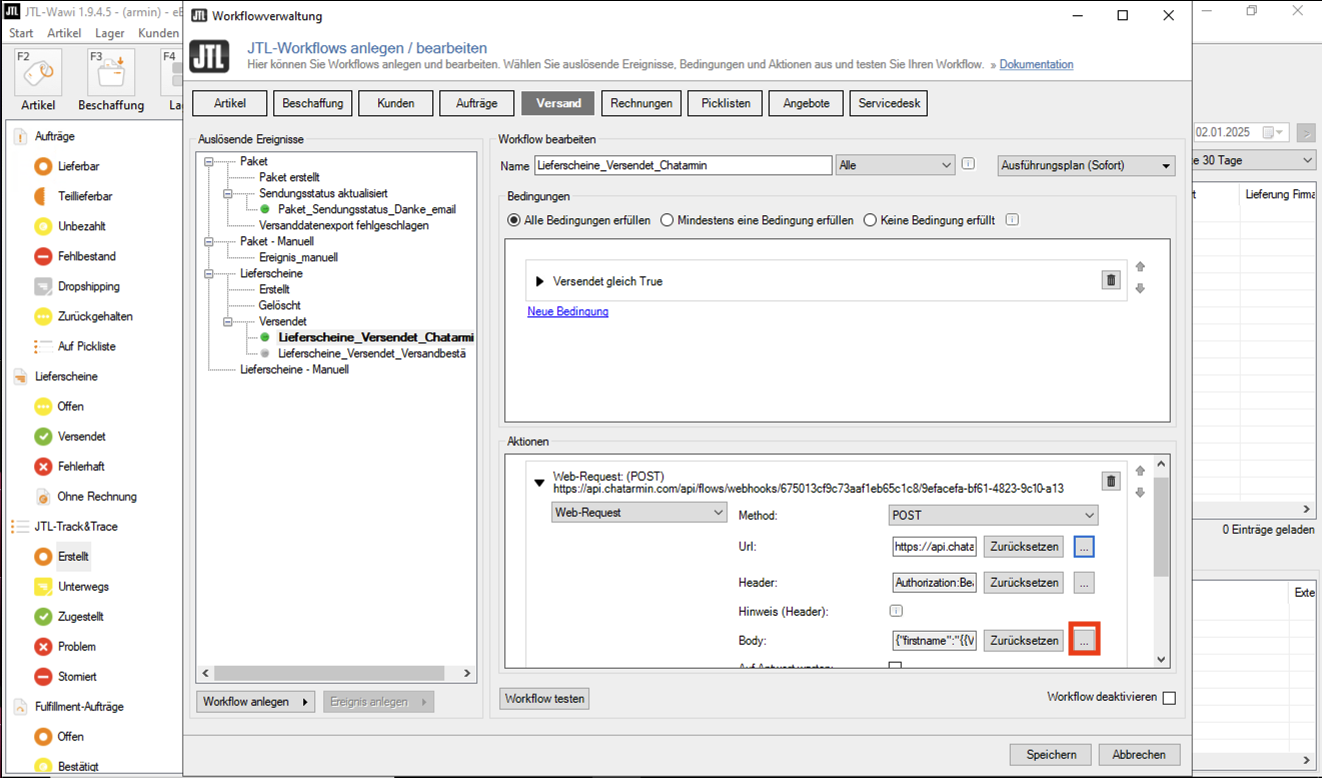
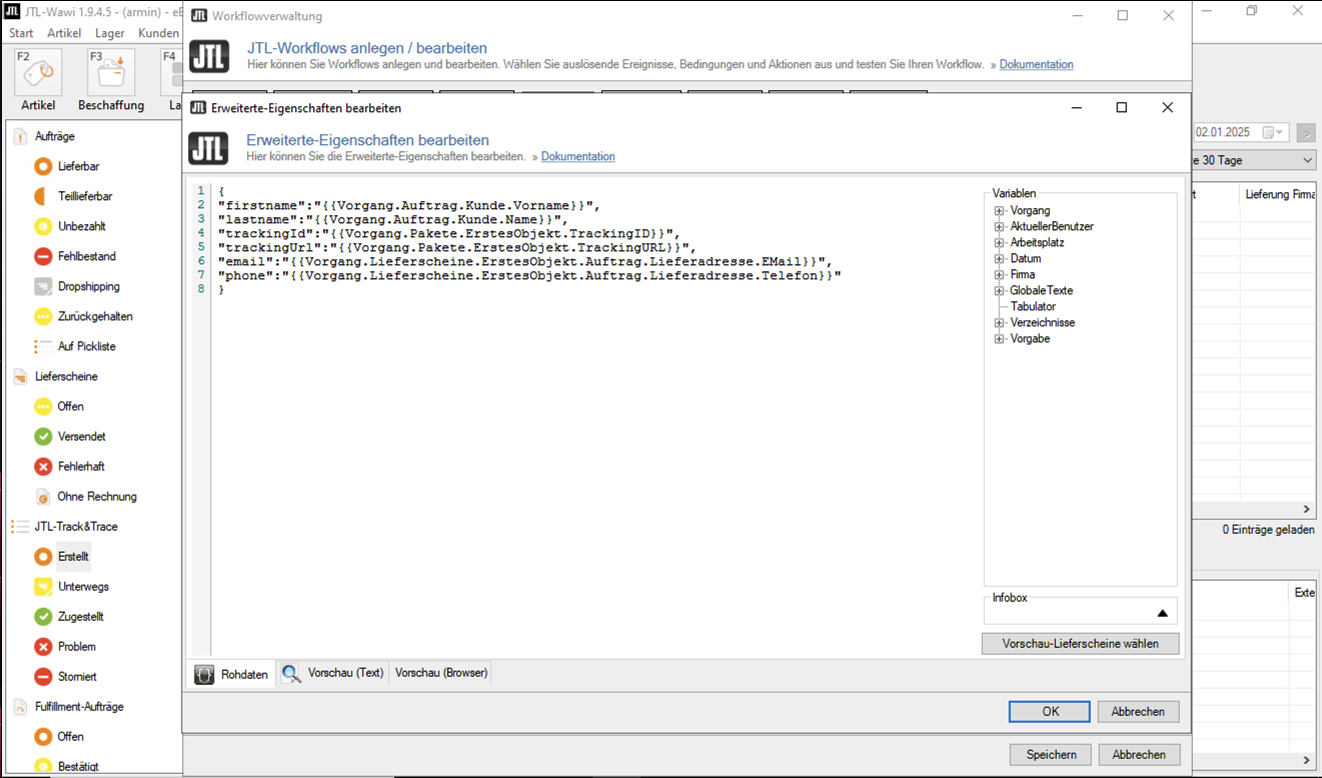
This is the Body you can paste in there:
{
"firstname":"#{{Vorgang.Auftrag.Kunde.Vorname}}",
"lastname":"#{{Vorgang.Auftrag.Kunde.Name}}",
"trackingId":"#{{Vorgang.Pakete.ErstesObjekt.TrackingID}}",
"trackingUrl":"#{{Vorgang.Pakete.ErstesObjekt.TrackingURL}}",
"email":"#{{Vorgang.Lieferscheine.ErstesObjekt.Auftrag.Lieferadresse.EMail}}",
"phone":"#{{Vorgang.Lieferscheine.ErstesObjekt.Auftrag.Lieferadresse.Telefon}}"
}
Double-check that the Variables in this Body are accessed correctly for your JTL-Version
Once you have that, you can publish the JTL Workflow and you will see enrollments in the Chatarmin Flow!
.png?token=eyJraWQiOiJzdG9yYWdlLXVybC1zaWduaW5nLWtleV9lMzQ5MTRlYi01NjlkLTRkNGYtODNhNi04MzFjODU0MzRlNmIiLCJhbGciOiJIUzI1NiJ9.eyJ1cmwiOiJoZWxwLWNlbnRlcnMvQXJtaW5fTG9nb19UcmFuc3BhcmVudF9CbHVlXygyKS5wbmciLCJpYXQiOjE3NjgzMzcwNzUsImV4cCI6NDkyMTkzNzA3NX0.3JpSAbn8b4OIktmPg9GDxJEMLAXlQn2ASxDwpEE7DbI)