Karla Integration
About Karla
Karla (gokarla.io) is a German company optimizing the post-purchase experience for online shops. Through Chatarmin's Karla integration, you can improve communication with your customers regarding their shipment via WhatsApp, providing them with full transparency and using these interactions to enhance upselling and retention strategies. Find the official Karla Chatarmin documentation here.
🚨Important: Karla offers native integrations for Shopify and Shopware, as well as an API integration. Karla's shipping triggers (e.g. out for delivery, parcelshop, damaged etc.) are sent to Klaviyo, which are available to WhatsApp through Chatarmin.
What’s required to get started with your Karla x Chatarmin integration
In order to make Karla’s shipping triggers available in Chatarmin, you need to
Use Karla’s ‘Notify’ Package, which includes providing shipment triggers to Klaviyo / Chatarmin
Integrate your Chatarmin account with your Klaviyo account
Step-by-Step Guide: How to use Karla’s shipment triggers for Chatarmin WhatsApp notifications
🛠️ Guide: How to use Karla’s shipment triggers for WhatsApp
Source: Karla, Q3 2024
Step-by-step Karla Chatarmin installation
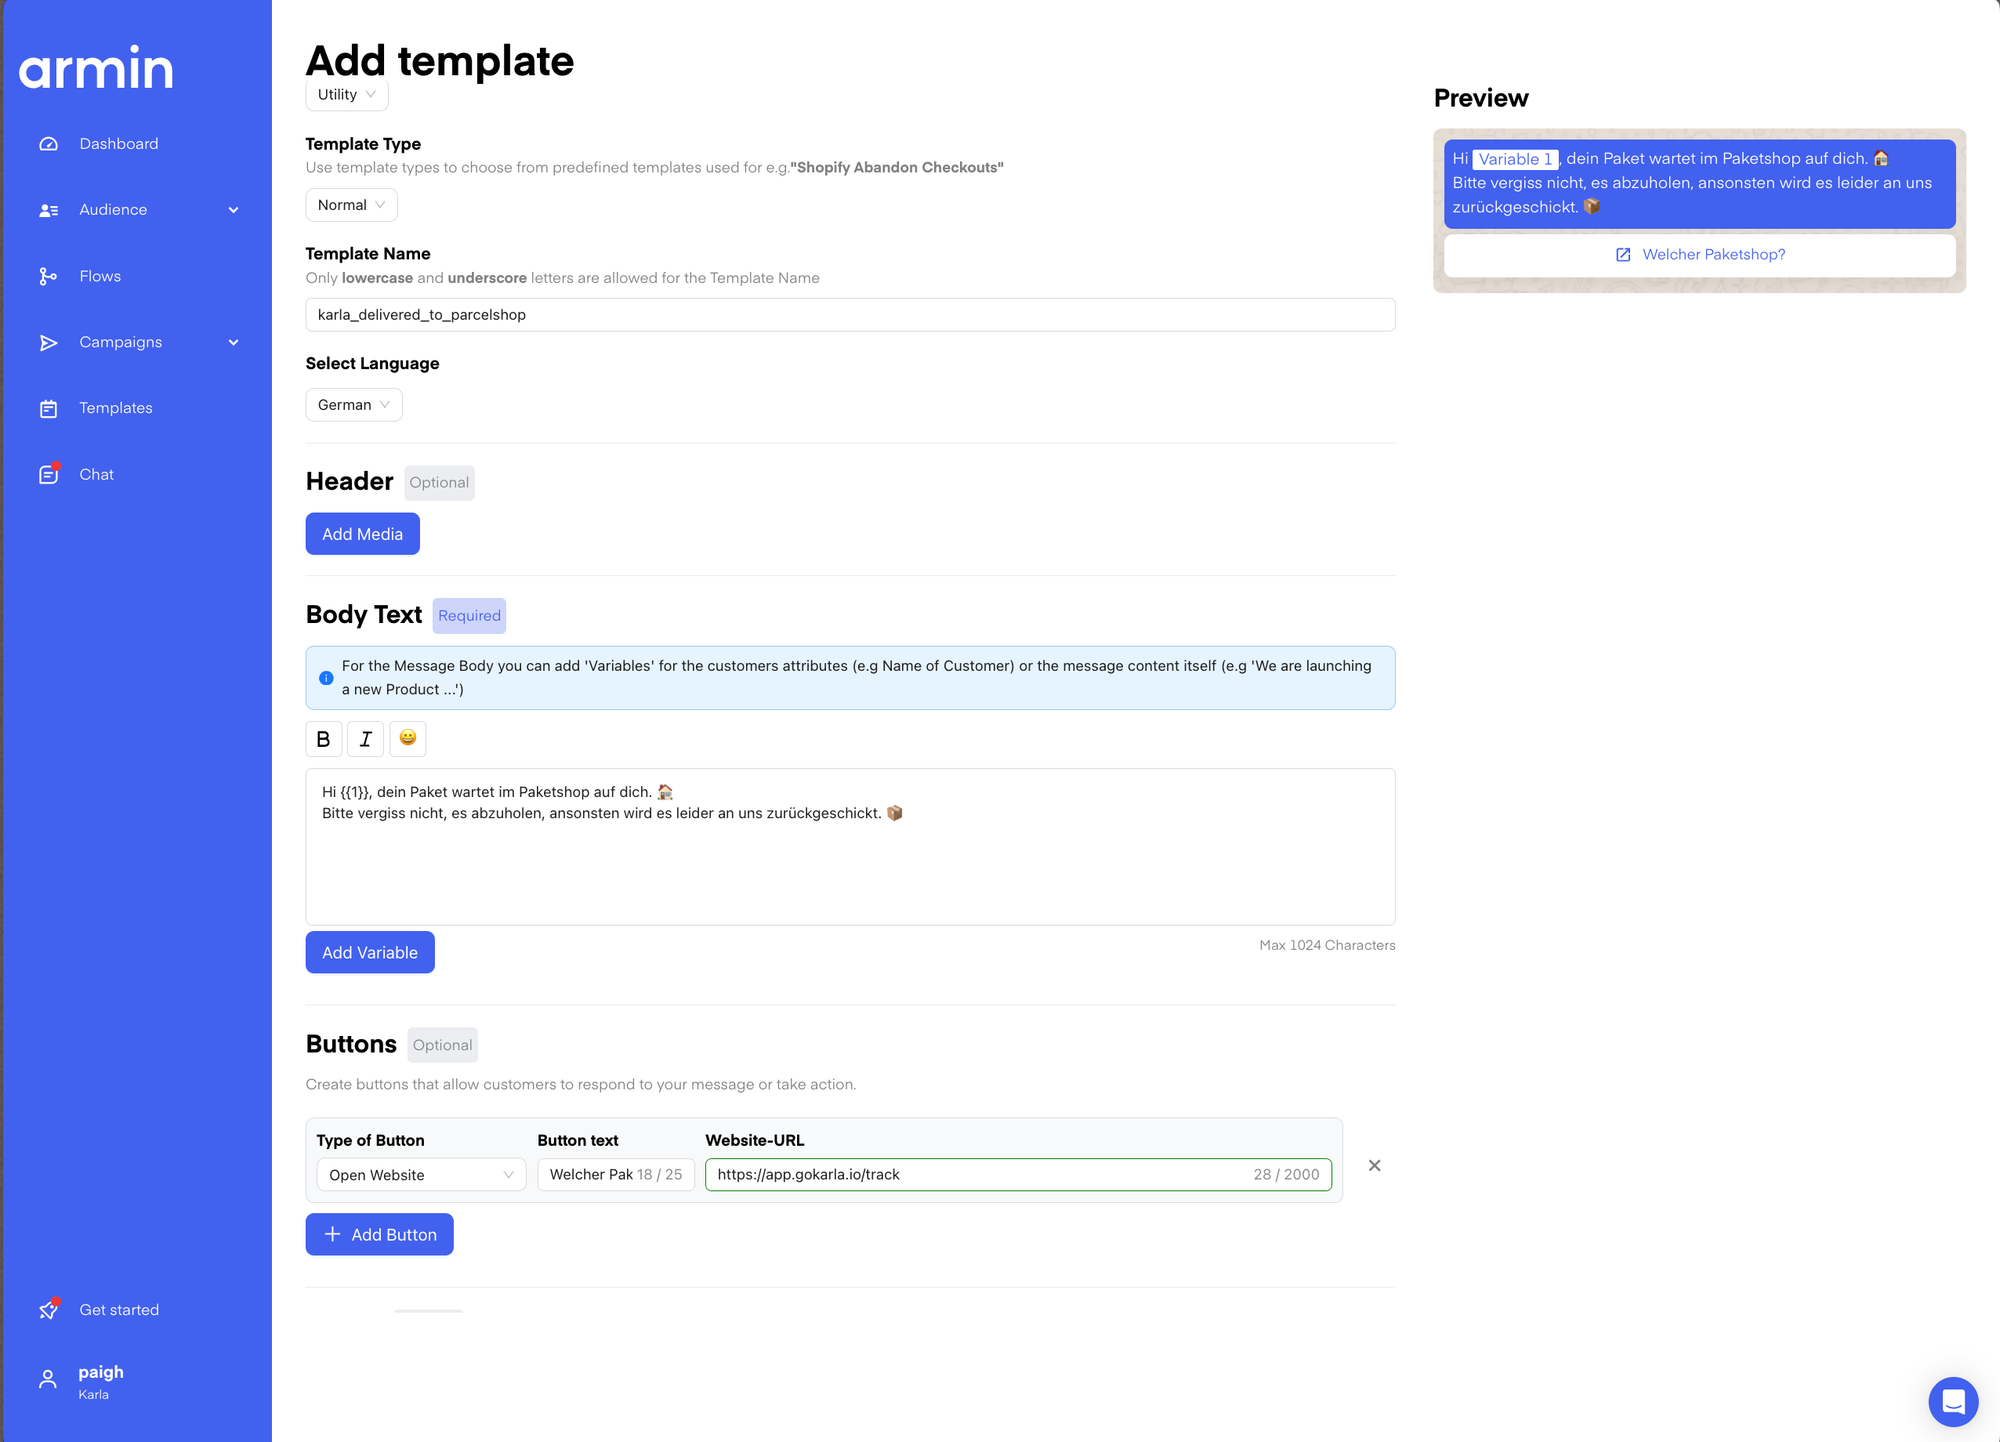
1. Create WhatsApp Template (e.g. ‘delivered_to_parcelshop’)
Select “Template Type” = Utility (as it will be used for transactional purposes)
Enter a text for the appropriate use case (e.g. a reminder to pick up the parcel at the parcelshop)
Add a button, selecting “Ppen website” and enter any URL (don’t worry about which URL you put in there → will be updated when setting up the flow later anyways)
Save the template. It will be reviewed and approved within a few of seconds.
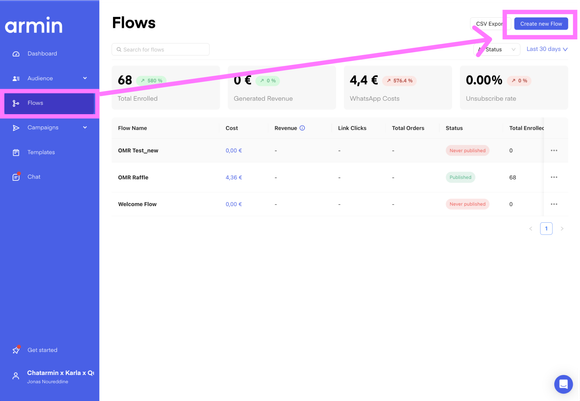
2. Create Chatarmin Flow
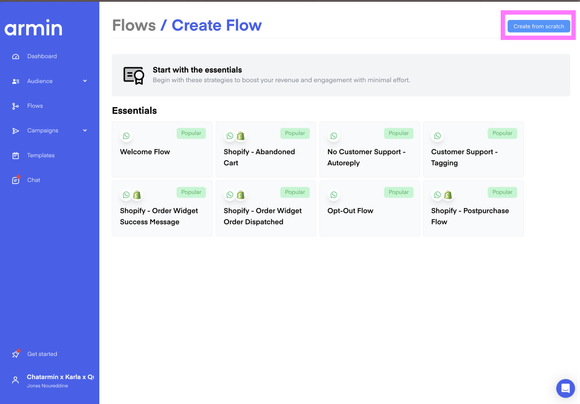
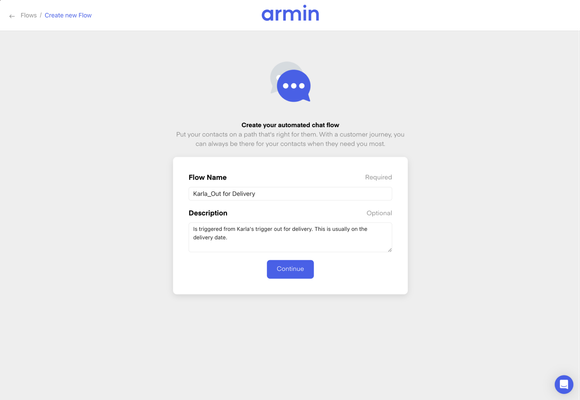
Go to flows, click on ‘Create new flow’ and ‘Create from scratch’. Give it a name, description (optional) and continue.
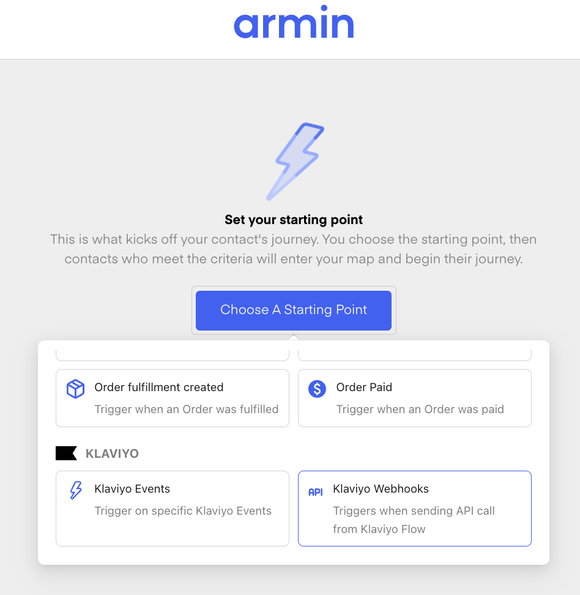
Select ‘Klaviyo Webhooks’ as a starting point and open the corresponding flow in Klaviyo.
Give it a name, description (optional) and continue.
Select ‘Klaviyo Webhooks’ as a trigger and open the corresponding flow in Klaviyo.
3. Configure webhook in Chatarmin & Klaviyo
Follow these steps:
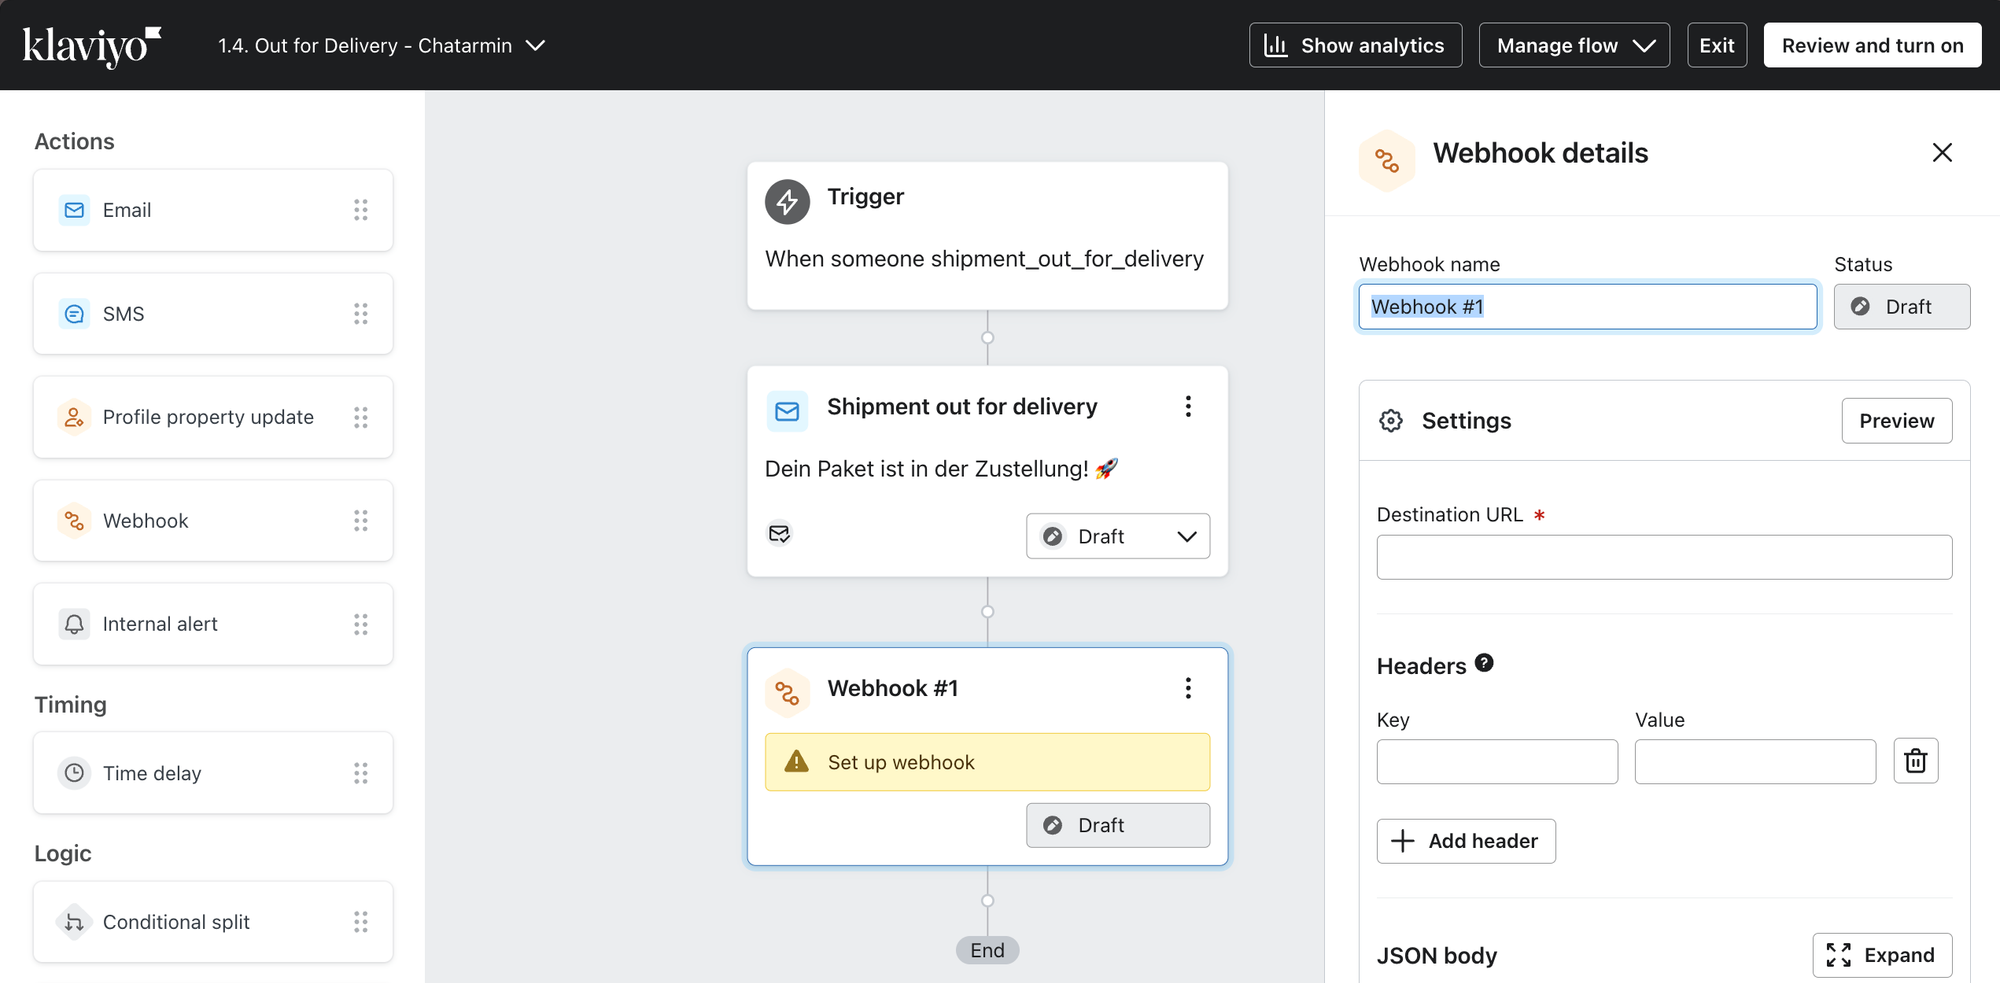
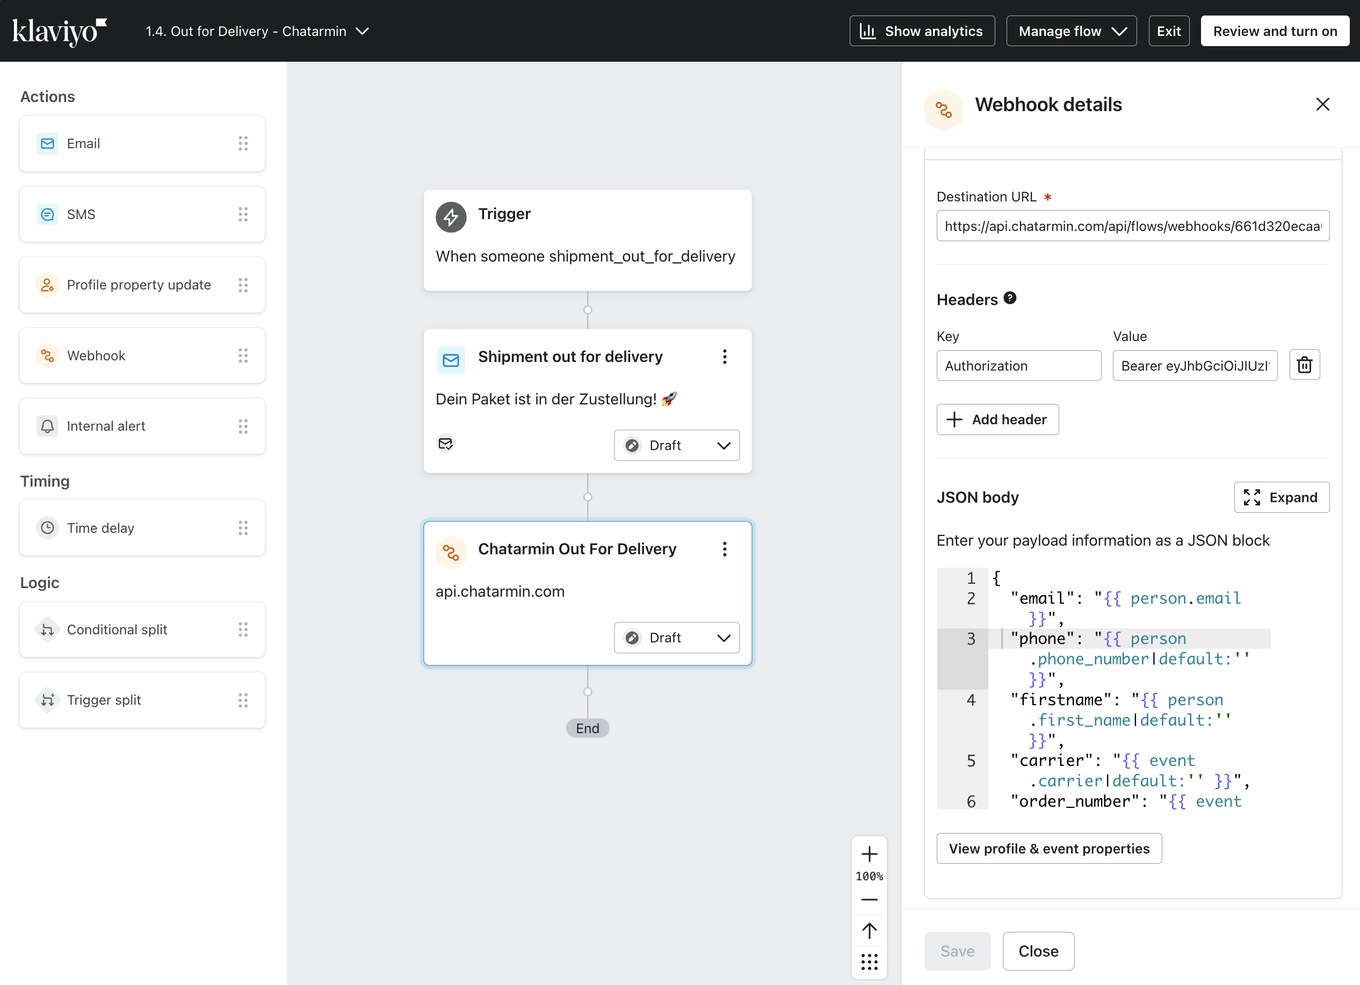
In the Klaviyo flow, add “webhook” as action following the respective shipment trigger and enter the Chatarmin webhook information: (Destination) URL, Key & Value from your Chatarmin flow into the Klaviyo fields and give the Webhook a name.
Adjust the ‘Payload’ in both Klaviyo’s ‘JSON payload field’ and Chatarmin’s webhook ‘Payload body’. They have to be identical, including the following variables:
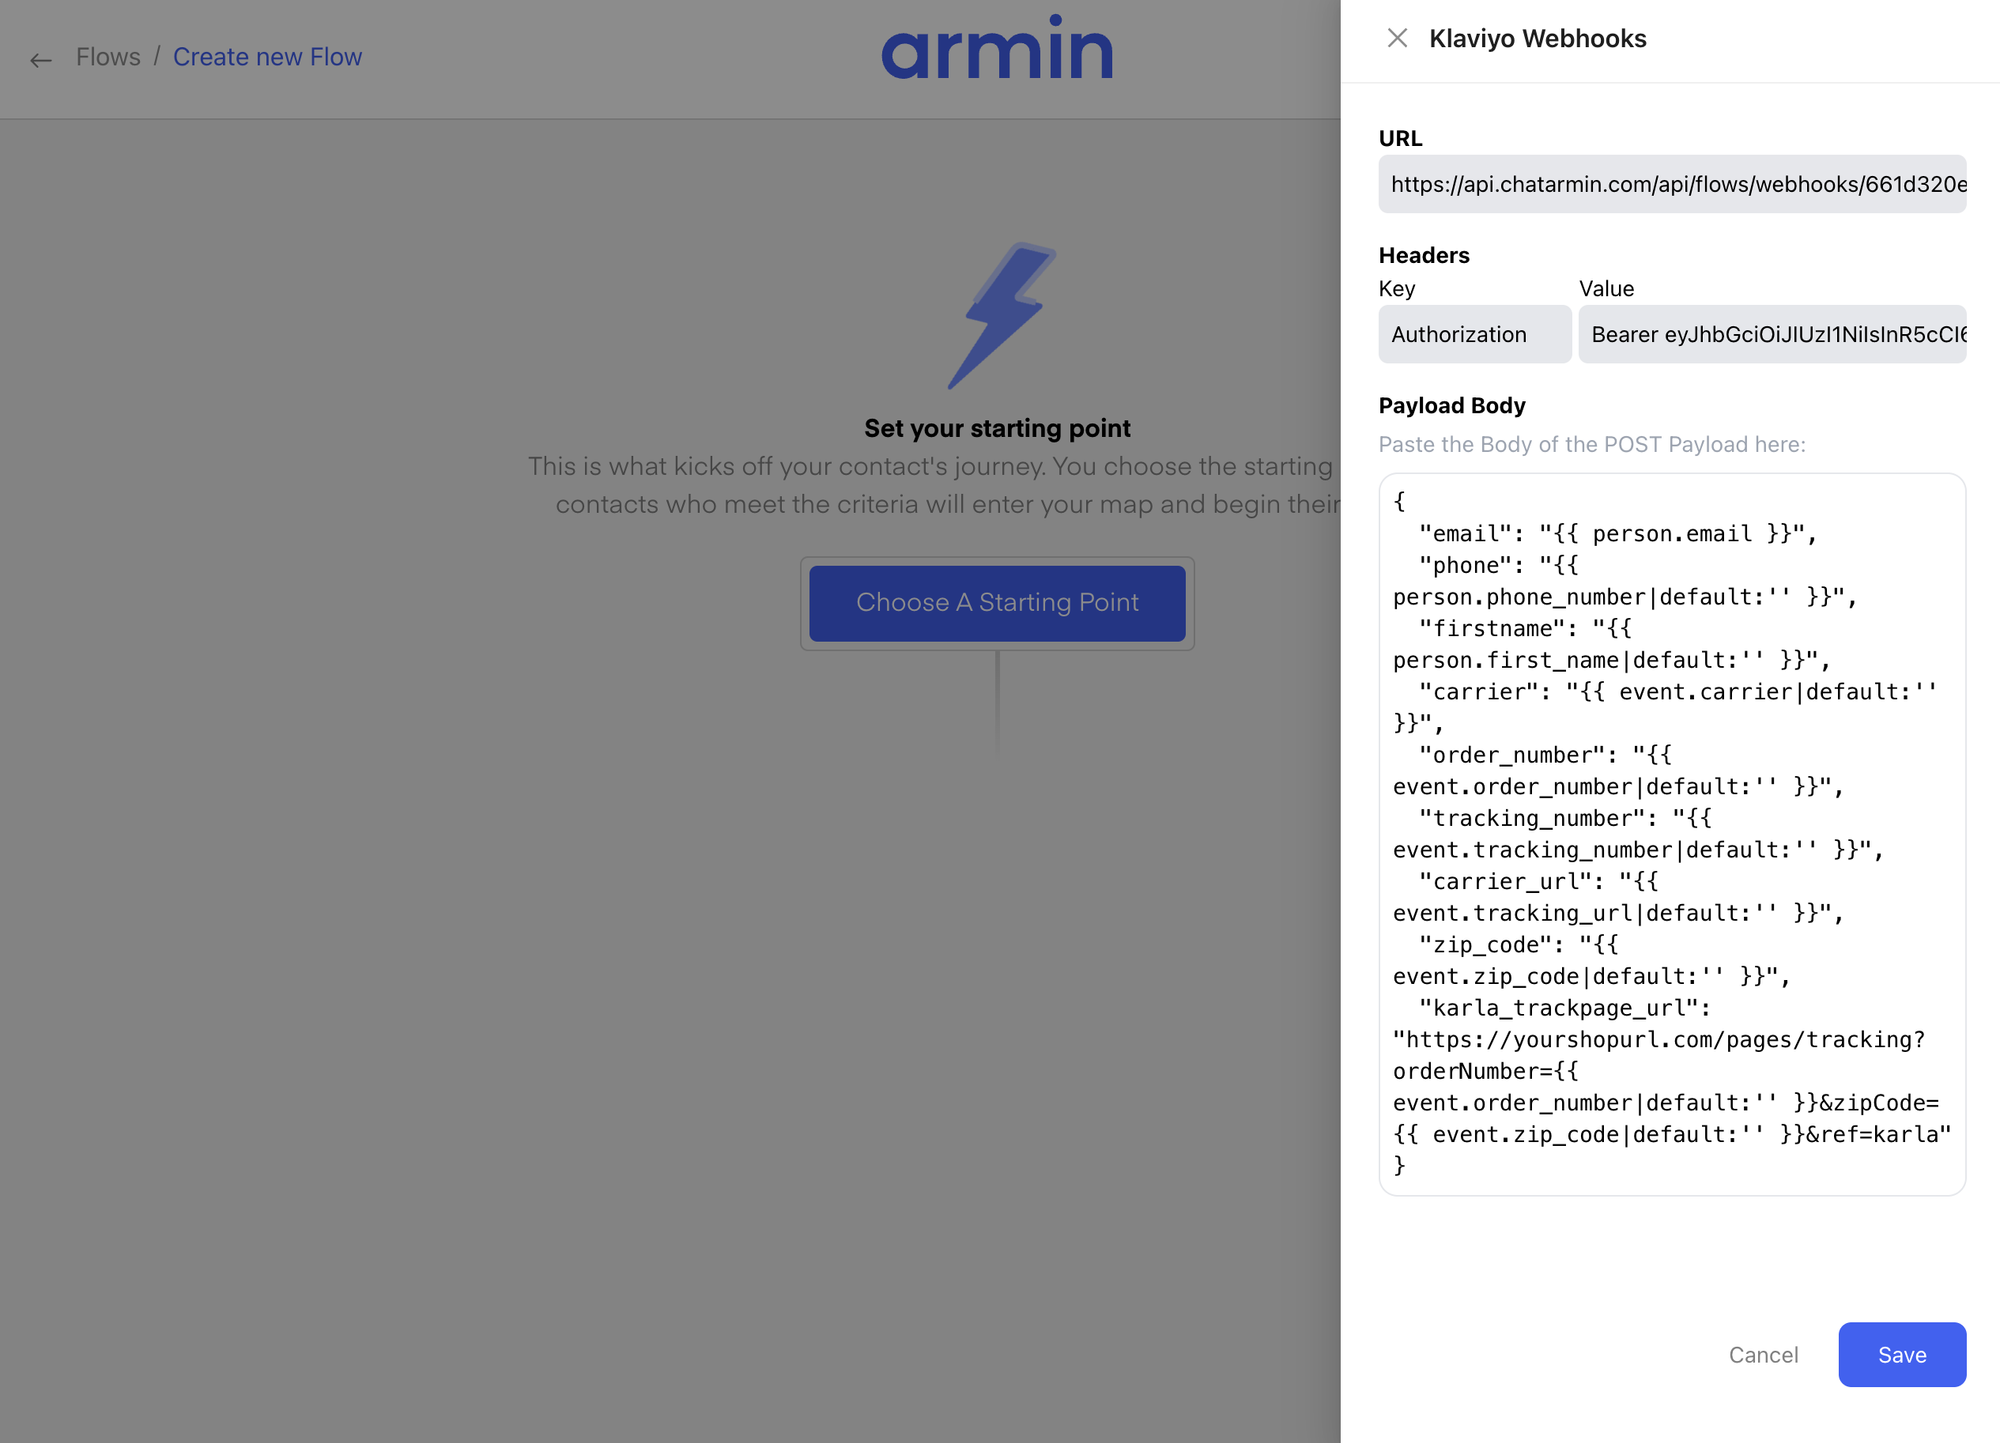
{ "email": "#{{ person.email }}", "phone": "#{{ person.phone_number|default:'' }}", "firstname": "#{{ person.first_name|default:'' }}", "carrier": "#{{ event.carrier|default:'' }}", "order_number": "#{{ event.order_number|default:'' }}", "tracking_number": "#{{ event.tracking_number|default:'' }}", "carrier_url": "#{{ event.tracking_url|default:'' }}", "zip_code": "#{{ event.zip_code|default:'' }}", "karla_trackpage_url": "<https://yourshopurl.com/pages/tracking?orderNumber=>#{{ event.order_number|default:'' }}&zipCode=#{{ event.zip_code|default:'' }}&ref=karla" }🚨 Important information on the payload:
Depending on the respective Karla trigger event, you can also select more available event properties and send them in the payload, e.g. for parcelshop, parcel locker & neighbour address.
The first part of the karla_trackpage_url needs to be adapted to your tracking page url. The latter part stays the same (xxx?orderNumber=#{{ event.order_number|default:'' }}&zipCode=#{{ event.zip_code|default:'' }}&ref=karla).
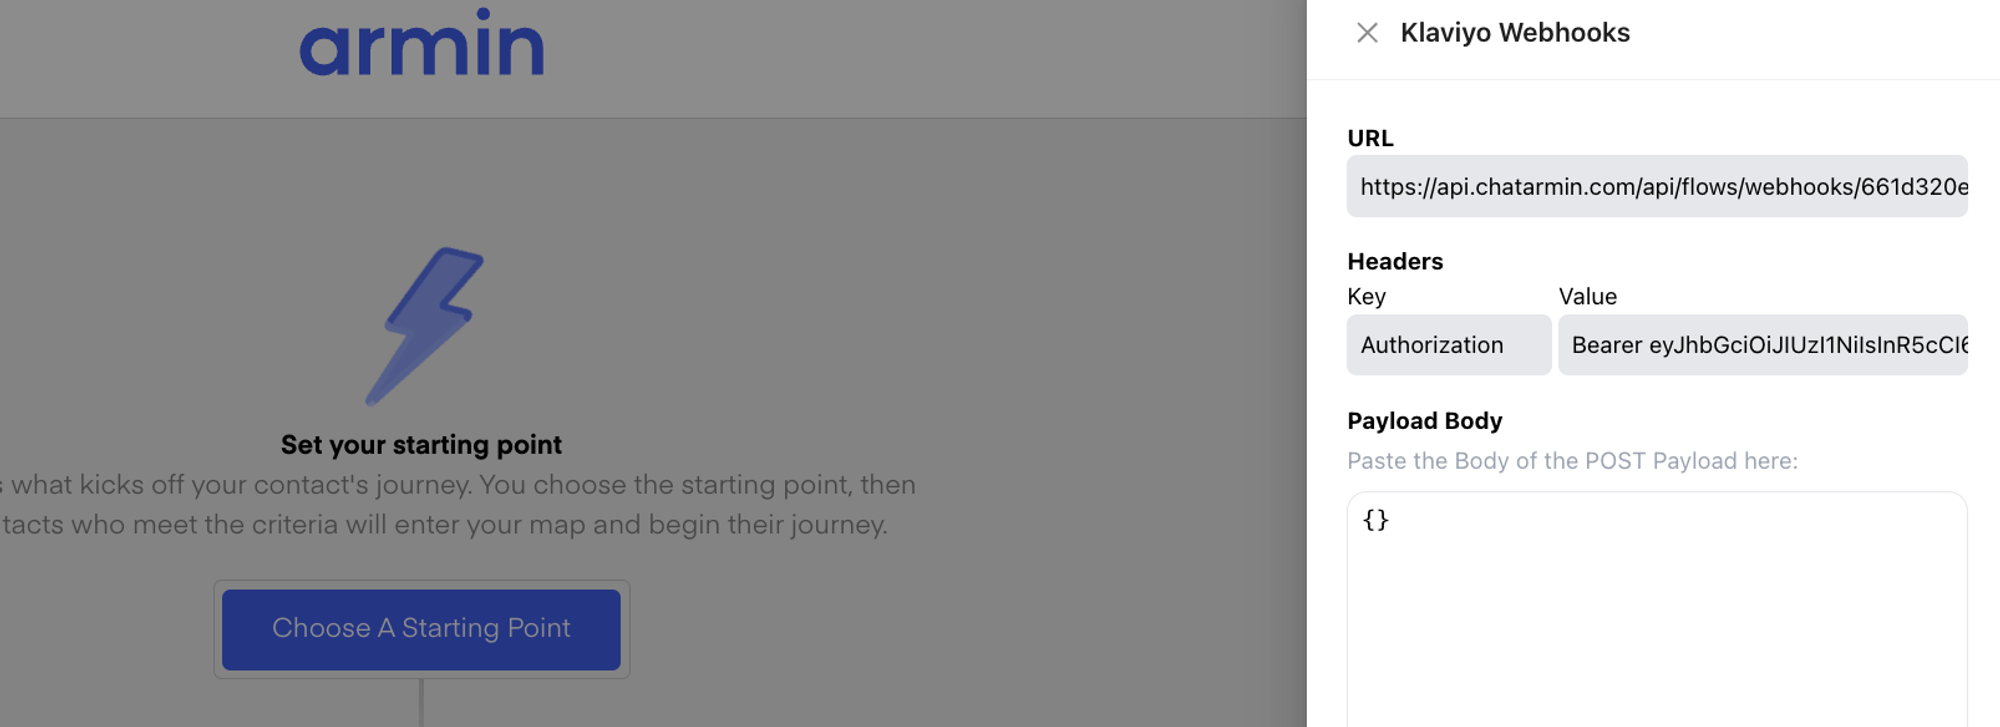
Enter the (Destination) URL, Key & Value from your Chatarmin flow into the Klaviyo fields and give the Webhook a name.
JSON body in Klaviyo
Payload Body in Chatarmin
🚨 Depending on the respective Karla trigger event, you can also select more available variables and send them in the payload, e.g. for parcelshop, parcellocker & neighbour address.
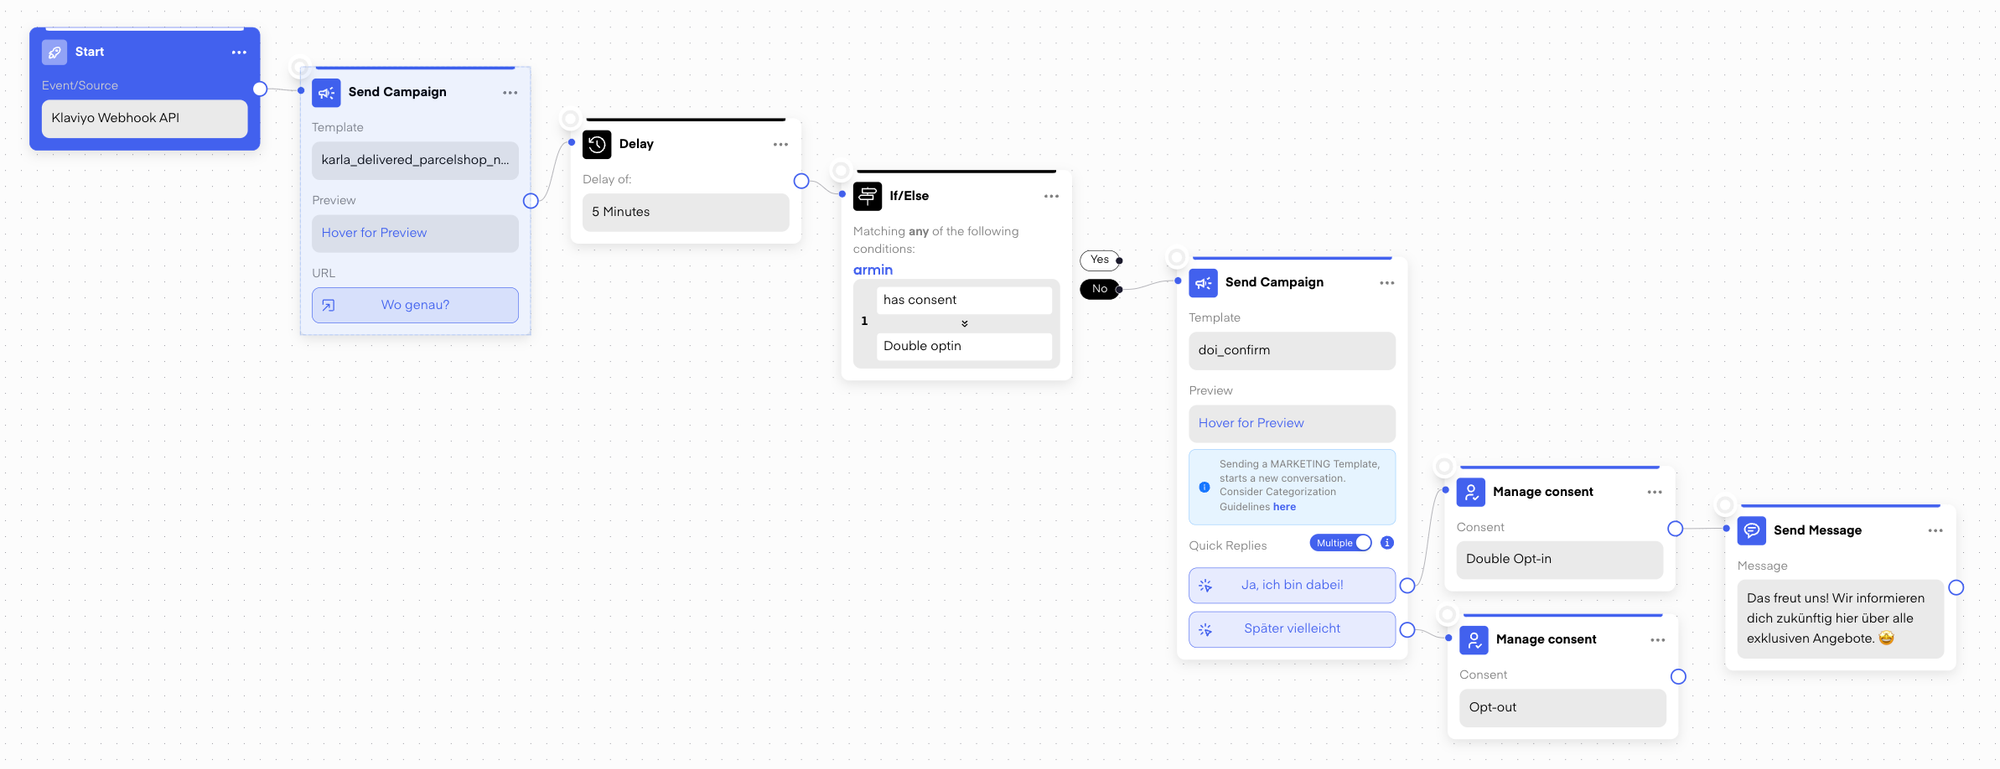
4. Save the webhook and build your Chatarmin flow
Save the webhook in Klaviyo (and set in live) and Chatarmin
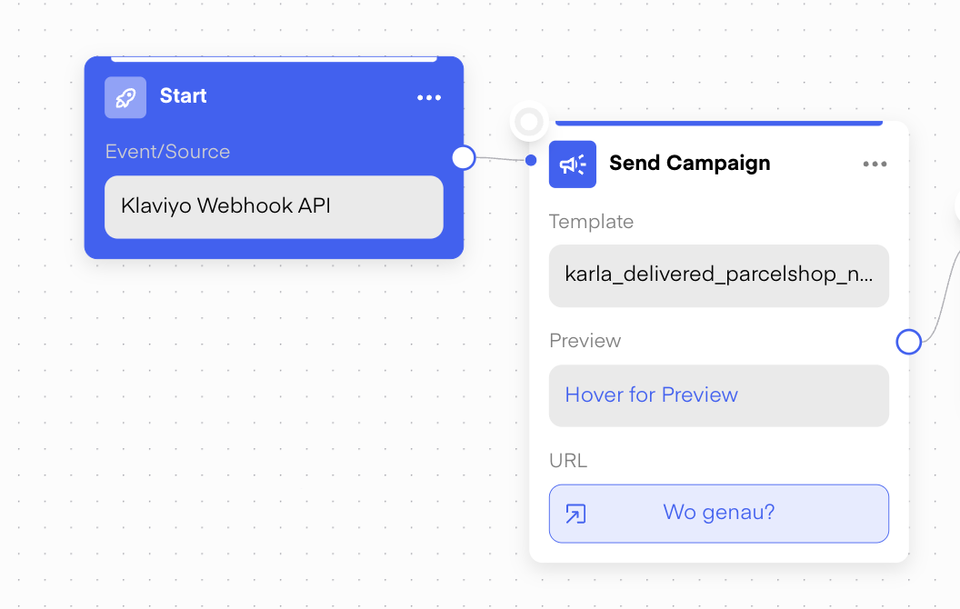
In Chatarmin’s flow builder, select ‘Send campaign’ as intended action.
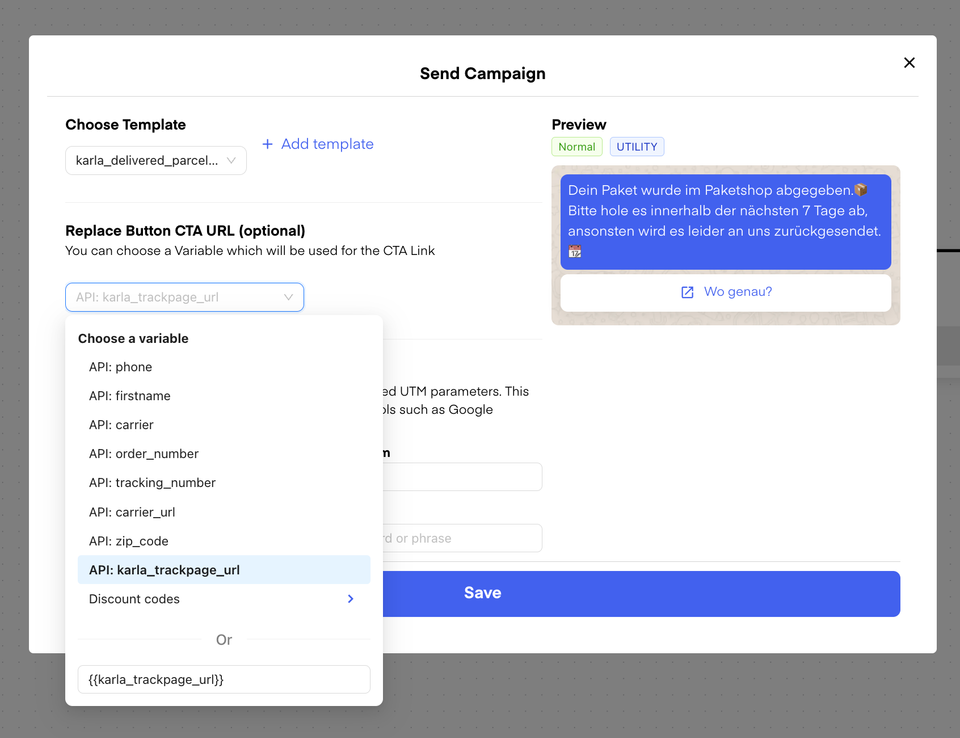
Pick the template you’ve set up in Step 1 and select “API: karla_trackpage_url” for the button.
Save the flow and select ‘Send campaign’ as intended action. Select your campaign template in the drop-down and replace the button URL with the karla_trackpage_url
5. Use the touchpoint to generate a double opt-in by extending your flow with a consent message.
Source: Chatarmin, Q3 2024